
touchSMS for Microsoft Outlook Set up and User Guide
1. Sign up and add credits
touchSMS is a pre-paid SMS platform – no contracts, hidden fees or minimum spend and you can close your account at any time. To sign up and activate your touchSMS account, all you need is a verified email address and mobile number – no credit card required.
We’ll even give you 10 free SMS credits to get you started.
You can then pre-purchase more credits as needed at 5c per credit or set up Auto-Top Up to ensure you don’t run out of credits when you’re sending. Click here for more information
One credit is used for 1 SMS of up to 160 characters. Your credit balance will always appear in the top right corner of your touchSMS account. To purchase credits log in to your touchSMS account:
- Navigate to Purchase > Credits
- Enter the number of prepaid Credits you wish to purchase and click Calculate.
- Complete your Payment Information using your credit card or PayPal account and click Finalise Purchase.
If you already have a touchSMS account, log in and move on to Step 2.
2. Download & install the App
You can enable the touchSMS for Outlook Add-in from within Outlook Get Add-ins or Microsoft AppSource.
Enable the Add-in within Outlook Add-ins:
-
-
-
- Opening Outlook
- Go to Home > Get Add-ins
- Type touchSMS for Outlook in the search field
- Click Add
-
-
Note: If you don’t see the touchSMS Add-in in the Home Ribbon simply click on;
Home > Get Add-ins > My Add-ins > Click on touchSMS for Outlook
In the ribbon that appears at the bottom of the screen click Add
Outlook add-ins are supported in Outlook 2013 or later on Windows, Outlook 2016 or later on Mac, Outlook on the web for Exchange 2013 on-premises and later versions, Outlook on iOS, Outlook on Android, and Outlook on the web and Outlook.com.
Get Add-Ins button not appearing or greyed out in Outlook Menu Ribbon – Click here for troubleshooting
3. Connecting Outlook with your touchSMS Account and Pin it to your Mailbox
Connect the Add-in to your touchSMS account using your API keys.
Log into your touchSMS account:
- Navigate to Settings > API Keys
- Click Create API Key.
- Enter a Name (for example; Outlook) for your API Key, the status will be set to Active by default, and click Save.
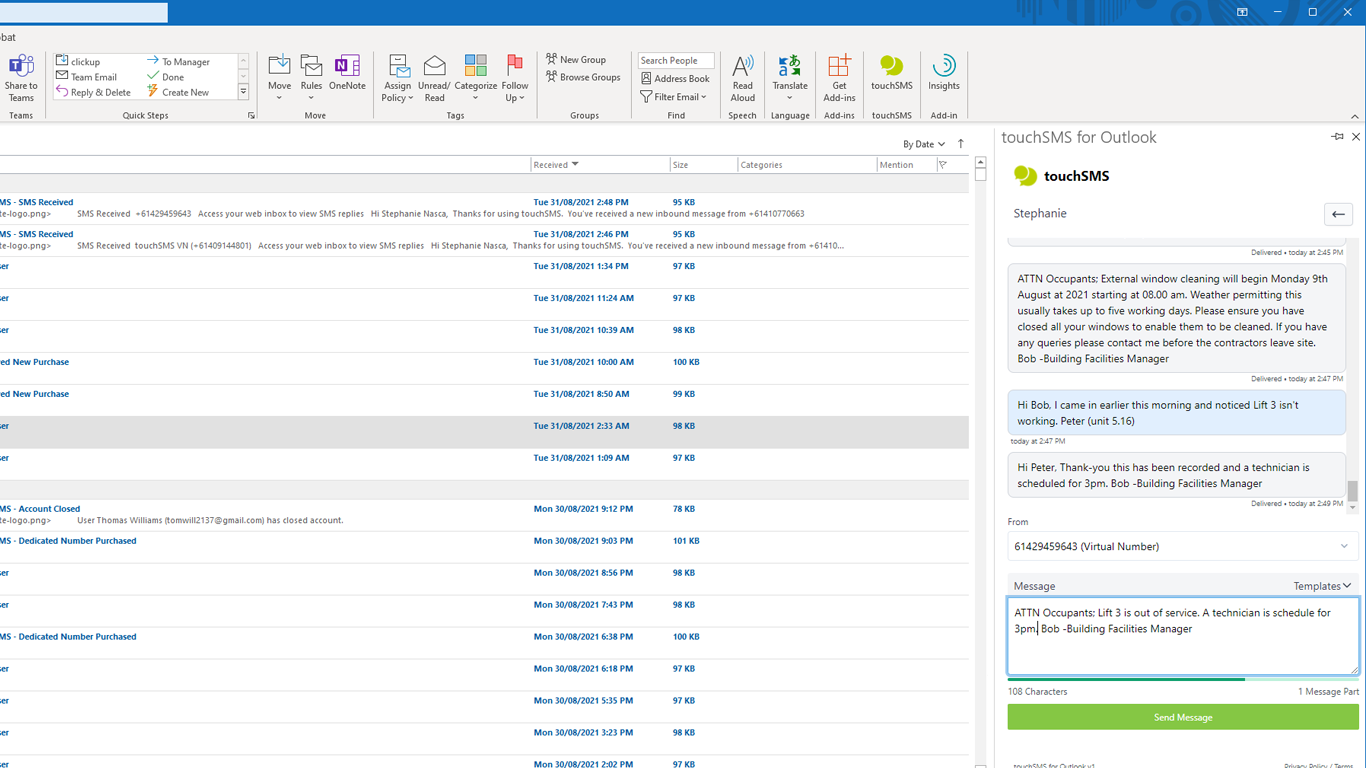
4. Sending SMS from touchSMS for Outlook
SMS Chat
1. To start a new chat, click the + or ⋮ icon from the top search bar
If you would like your recipients to reply to your SMS
-
- Shared Local Number – Replies to Web Inbox & Email (Allow Replies)
This is a shared pool of mobile numbers that allow you to receive replies to SMS sent. Numbers are randomly selected, so recipients receive messages from a different number each time you send. This is free to use and receive replies. - Virtual Number – Replies to Web Inbox & Email (Allow Replies)
You can purchase a Virtual Number from your touchSMS account (pricing and availability vary per region). This number is assigned to your account exclusively to send and receive messages, so recipients receive messages from the same number each time you send. Click here for more info - Sender ID – No Replies
Replace the sender number with a word like ALERT, URGENT or send from your brand name, by setting up an Alphanumeric Sender ID (availability varies per region). Telecommunication protocols limit an Alpha Sender ID to a maximum of 11 characters long and cannot contain any spaces or symbols, so you sometimes need to get creative with abbreviating longer names. Recipients CANNOT reply to messages sent using a Sender ID. - Own Number – Replies to Your Mobile
As your mobile number is verified at signup, you can send SMS from touchSMS using your registered mobile number. Replies to messages sent using your mobile number will be received by your mobile therefore not received in your touchSMS account.
- Shared Local Number – Replies to Web Inbox & Email (Allow Replies)
Your touchSMS templates are managed from your online account. To create a new template or manage an existing one simply login in and navigate to SMS > Templates click here for more information
Send Campaign
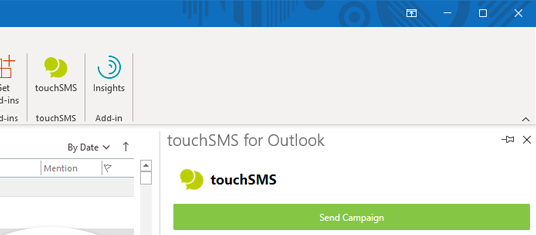
1. Click on the touchSMS for Outlook Add-in in your Home menu ribbon to open the Add-in, then click Send Campaign.
2. Use the Recipients dropdown to select or search recipients from your saved touchSMS contacts or manually enter or paste numbers in the recipient field.
If you would like your recipients to reply to your SMS
-
- Shared Local Number – Replies to Web Inbox & Email (Allow Replies)
This is a shared pool of mobile numbers that allow you to receive replies to SMS sent. Numbers are randomly selected, so recipients receive messages from a different number each time you send. This is free to use and receive replies. - Virtual Number – Replies to Web Inbox & Email (Allow Replies)
You can purchase a Virtual Number from your touchSMS account (pricing and availability vary per region). This number is assigned to your account exclusively to send and receive messages, so recipients receive messages from the same number each time you send. Click here for more info - Sender ID – No Replies
Replace the sender number with a word like ALERT, URGENT or send from your brand name, by setting up an Alphanumeric Sender ID (availability varies per region). Telecommunication protocols limit an Alpha Sender ID to a maximum of 11 characters long and cannot contain any spaces or symbols, so you sometimes need to get creative with abbreviating longer names. Recipients CANNOT reply to messages sent using a Sender ID. - Own Number – Replies to Your Mobile
As your mobile number is verified at signup, you can send SMS from touchSMS using your registered mobile number. Replies to messages sent using your own mobile number will be received by your mobile therefore not received in your touchSMS account.
- Shared Local Number – Replies to Web Inbox & Email (Allow Replies)
(To create templates, login to your touchSMS account and go to SMS > Templates click here for more information)
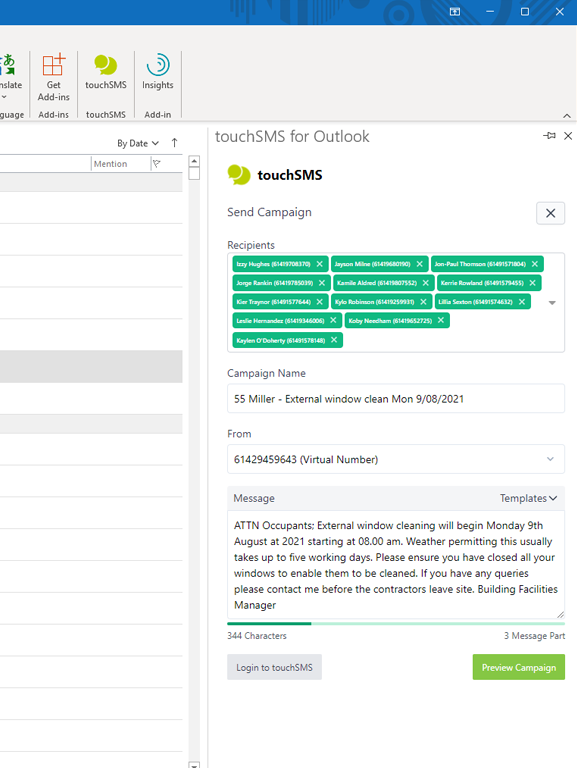
8. The Campaign Summary will detail exactly how many numbers you are sending to, the length of the message, and calculate the cost of your campaign in SMS credits. (If you do not have enough SMS credits a notification will appear, that will direct you to Purchases in touchSMS so you can purchase more)
9. Click Send Now to submit your campaign for delivery
5. Hiding or removing touchSMS for Outlook Add-in
To remove the touchSMS for Outlook Add-in, simply right-click on the Add-in in the menu ribbon and select “Remove Add-in”.
6. Troubleshooting
Can I use this Add-in with my version of Outlook?
Outlook add-ins are supported in Outlook 2013 or later on Windows, Outlook 2016 or later on Mac, Outlook on the web for Exchange 2013 on-premises and later versions, Outlook on iOS, Outlook on Android, and Outlook on the web and Outlook.com. Not all of the newest features are supported in all clients at the same time.
NOTE: Issued reported in Outlook Version 1902 (2019) where Add-in window is blank, can only be resolved with update to Outlook application.