
How to install the touchSMS app for HubSpot
1. Sign up and add credits
touchSMS is a pre-paid SMS platform – no contracts, hidden fees or minimum spend and you can close your account at any time. To sign up and activate your touchSMS account, all you need is a verified email address and mobile number – no credit card required.
We’ll even give you 10 free SMS credits to get you started.
You can then pre-purchase more credits as needed at 5c per credit or set up Auto-Top Up to ensure you don’t run out of credits when your sending. Click here for more information
One credit is used for 1 SMS of up to 160 characters. Your credit balance will always appear in the top right corner of your touchSMS account.
To purchase credits log in to your touchSMS account:
- Navigate to Purchase > Credits
- Enter the number of prepaid Credits you wish to purchase and click Calculate.
- Complete your Payment Information using your credit card or PayPal account and click Finalise Purchase.
If you already have a touchSMS account, log in and move onto Step 2.
2. Install and configure the App
You can enable the touchSMS for HubSpot App from within your touchSMS account or HubSpot App Marketplace.
Enable the App from your touchSMS Account:
-
-
-
- Login to touchSMS
- Go to Integrations > HubSpot > Configure
- Click Connect on the HubSpot integration setup page, you will then be prompted to login into your HubSpot account to connect the App. (Note: if you are already logged into HubSpot this step will be skipped)
- Select your database and click Connect, your touchSMS App has been enabled.
-
-
Enable the App from HubSpot App marketplace:
-
-
-
- Visit the Hubspot App Marketplace and search for touchSMS, then select the touchSMS app from the list
- Click on the Install App in the top right and you will be redirected to your touchSMS account.
- Login to your touchSMS account and click Connect on the HubSpot integration setup page.
- Click Connect on the HubSpot integration setup page, you will then be prompted to login into your HubSpot account to connect the App. (Note: if you are already logged into HubSpot this step will be skipped)
- Select your database and click Connect, your touchSMS App has been enabled.
-
-
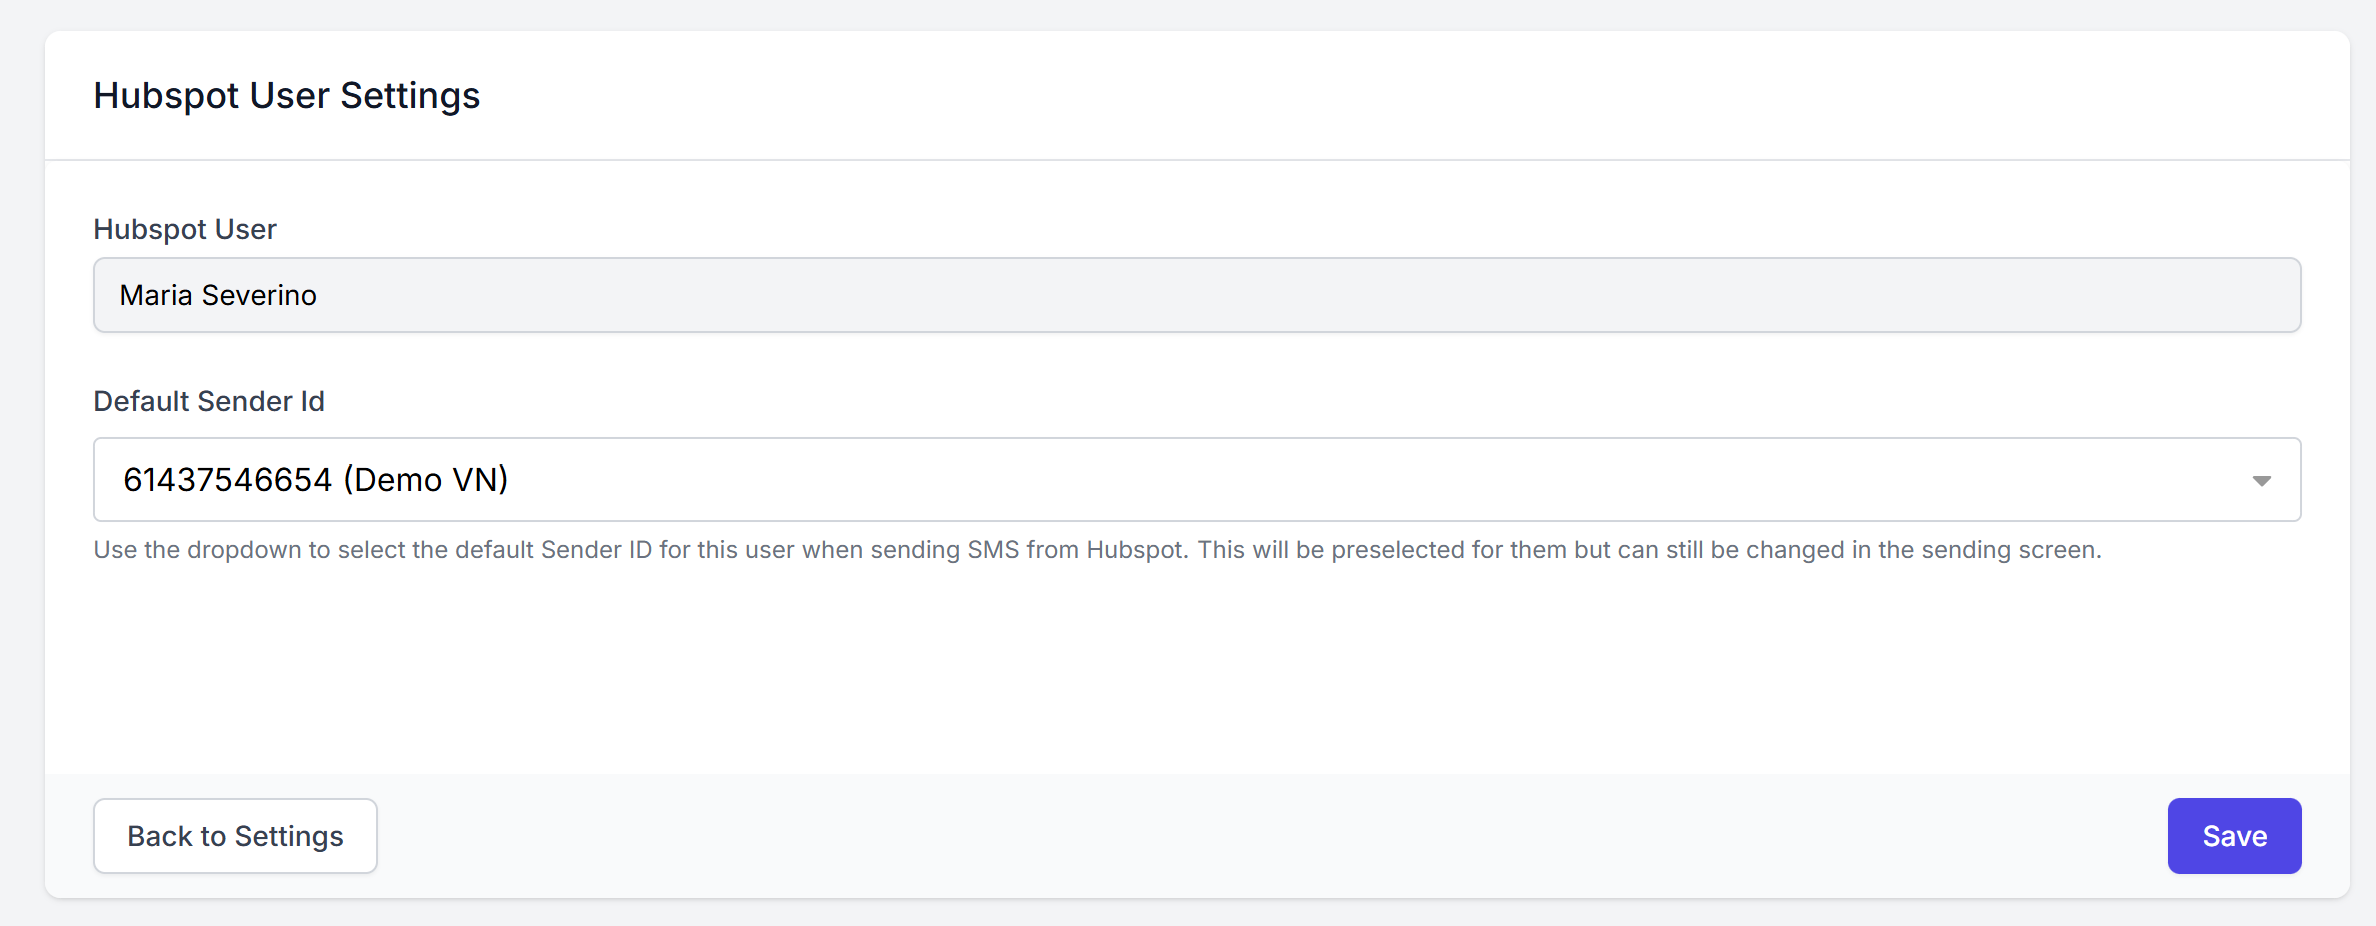
Once installed, all users on your HubSpot account will have SMS connectivity and appear in the HubSpot User list in touchSMS.
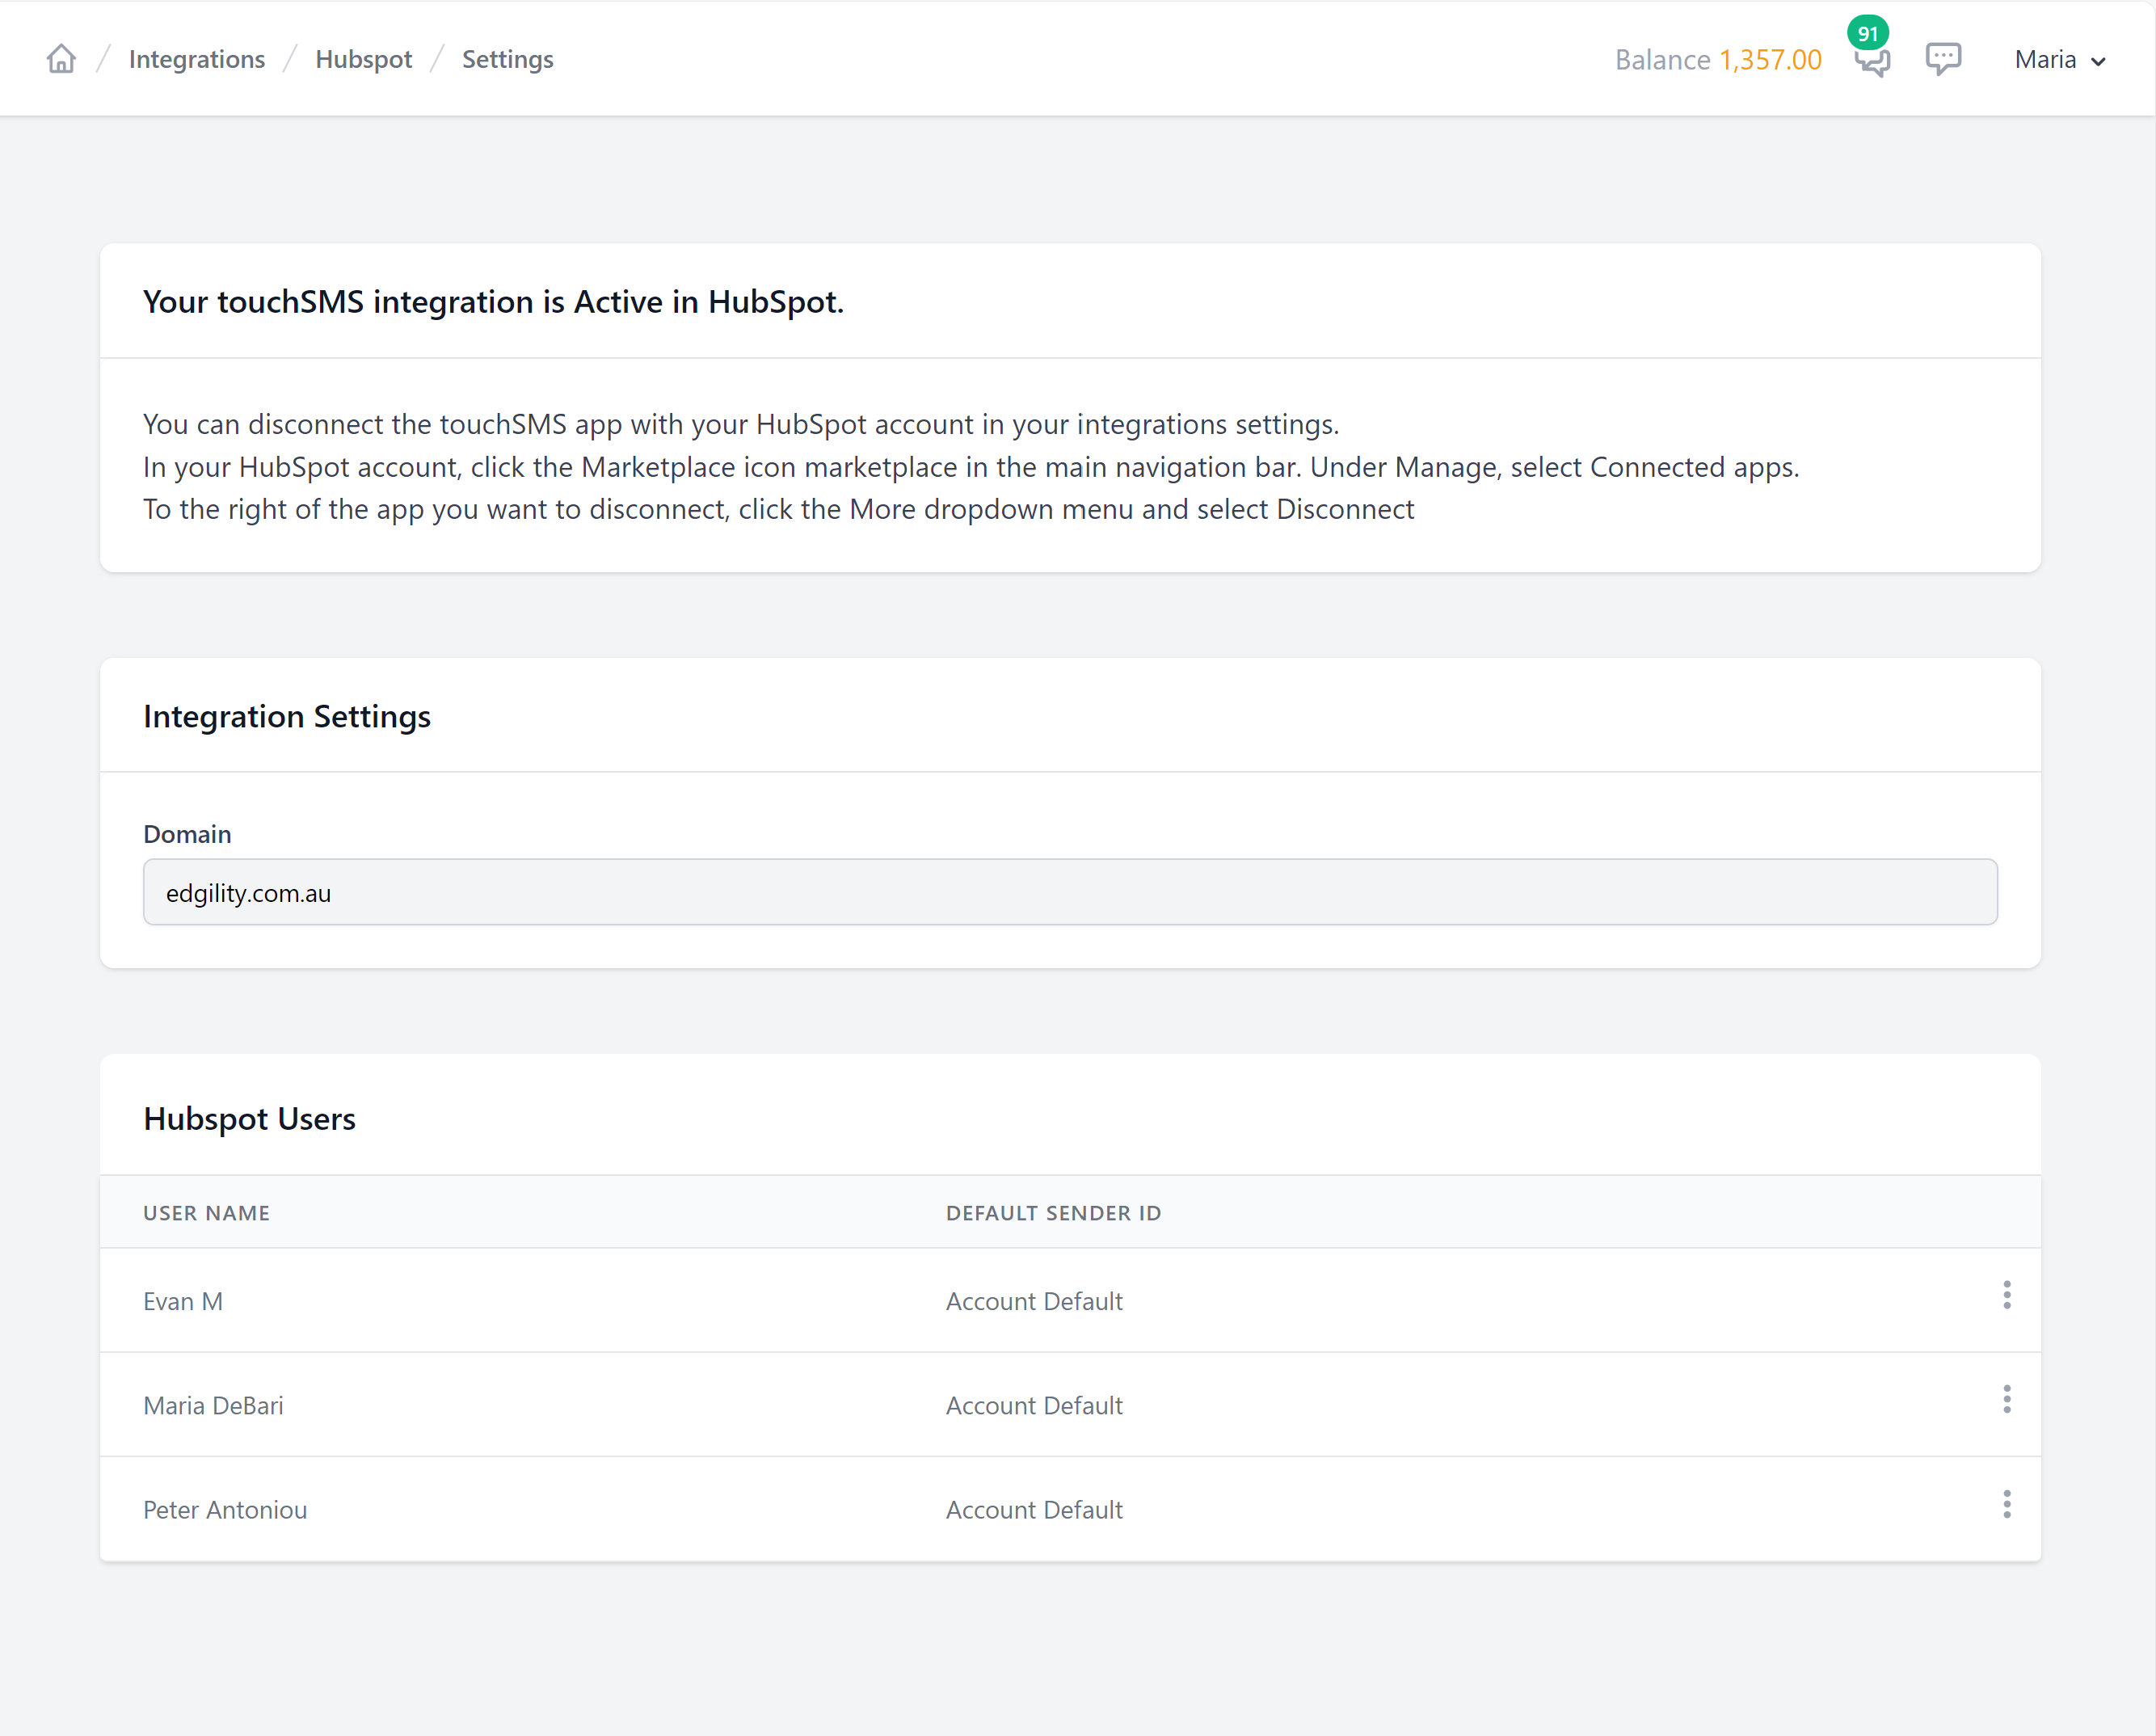
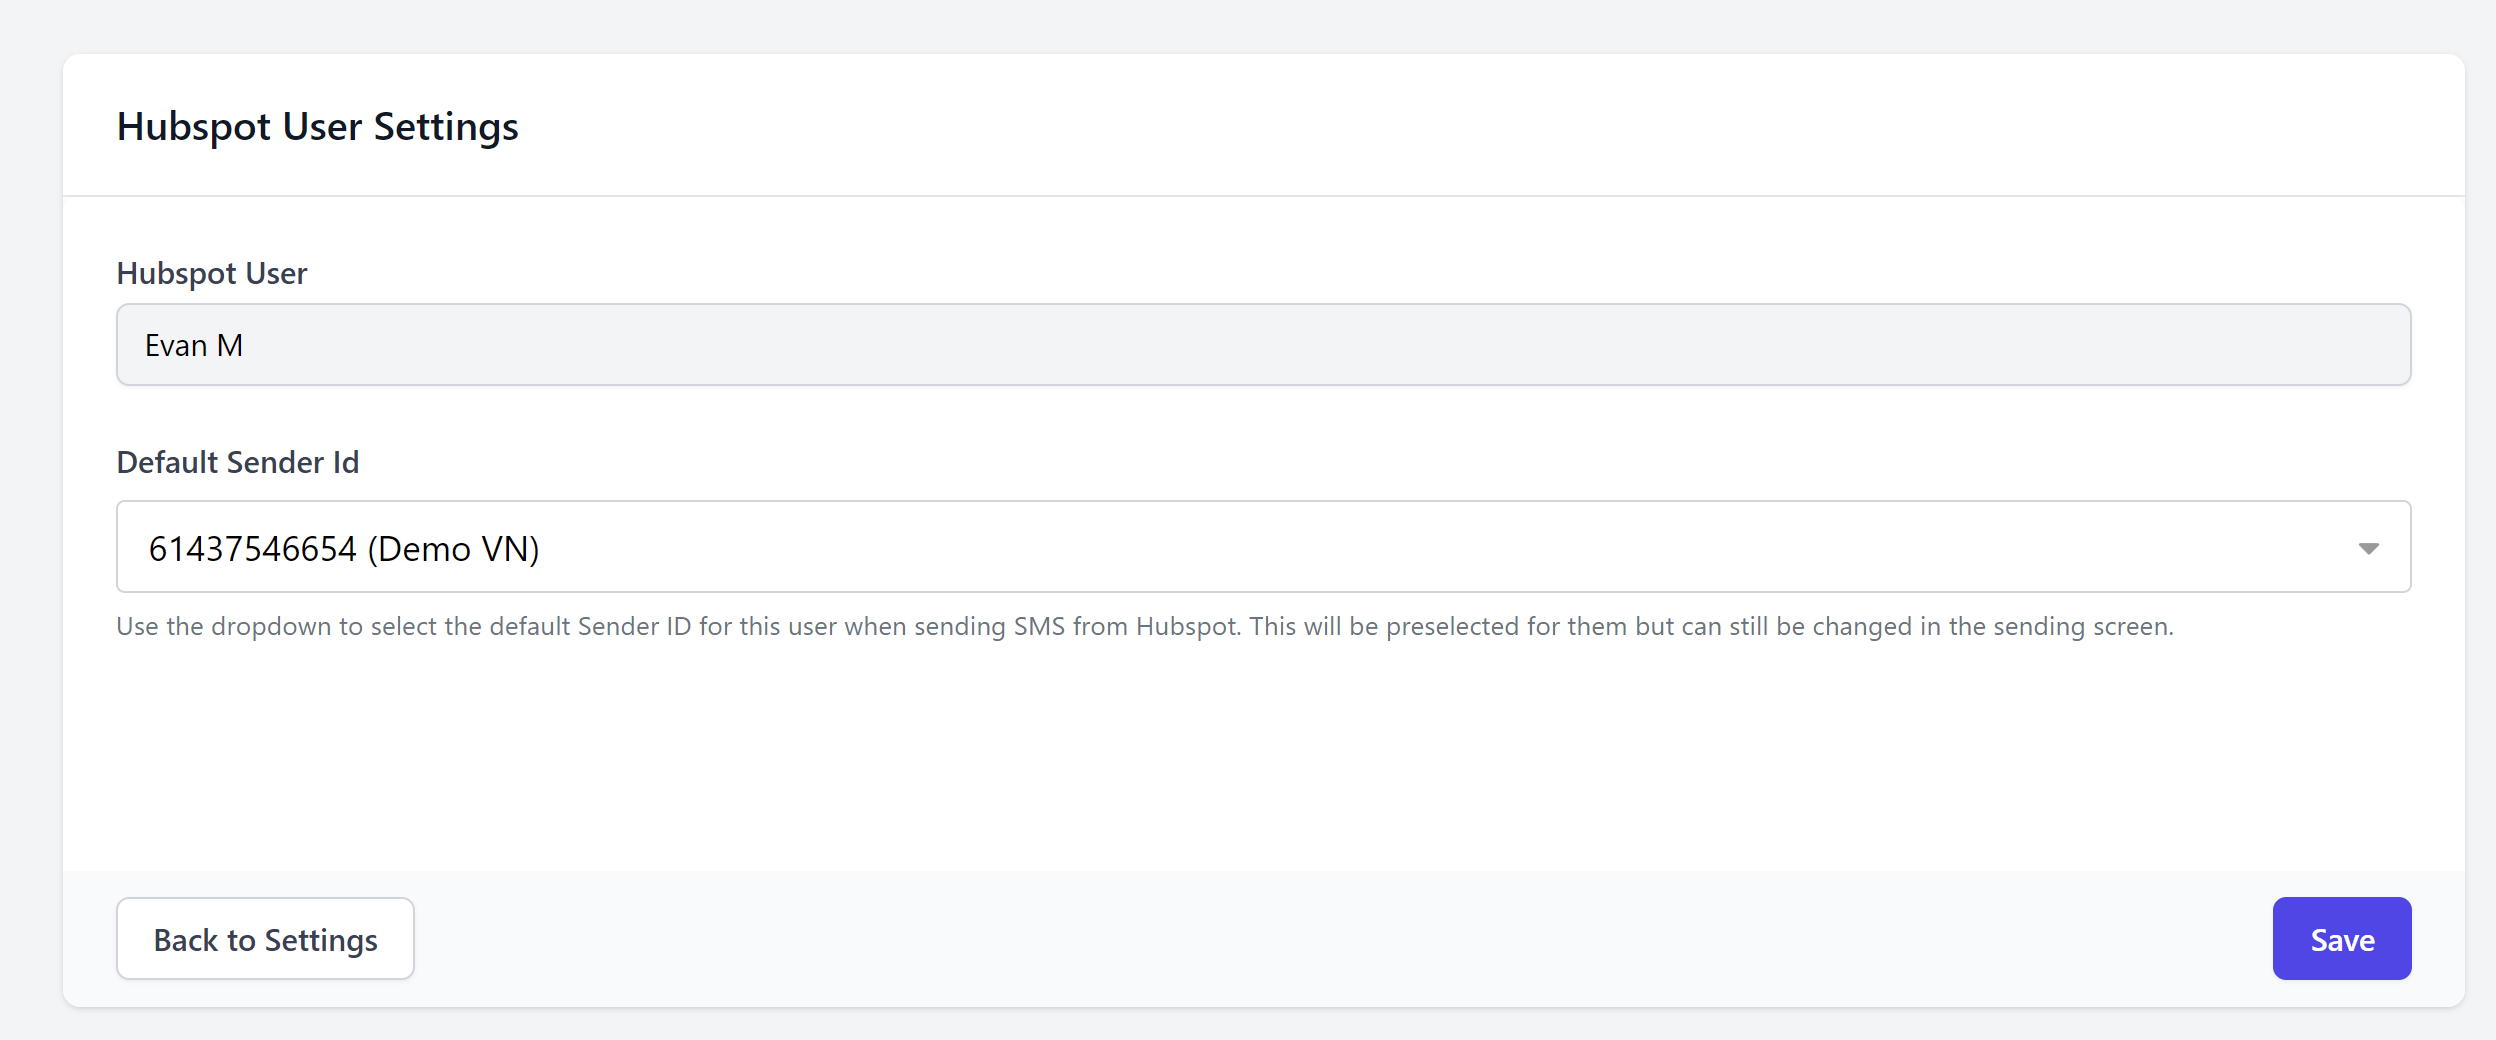
Click the three dots and select SETTINGS to assign a different default Sender ID for each user.
3. SMS from HubSpot Contacts
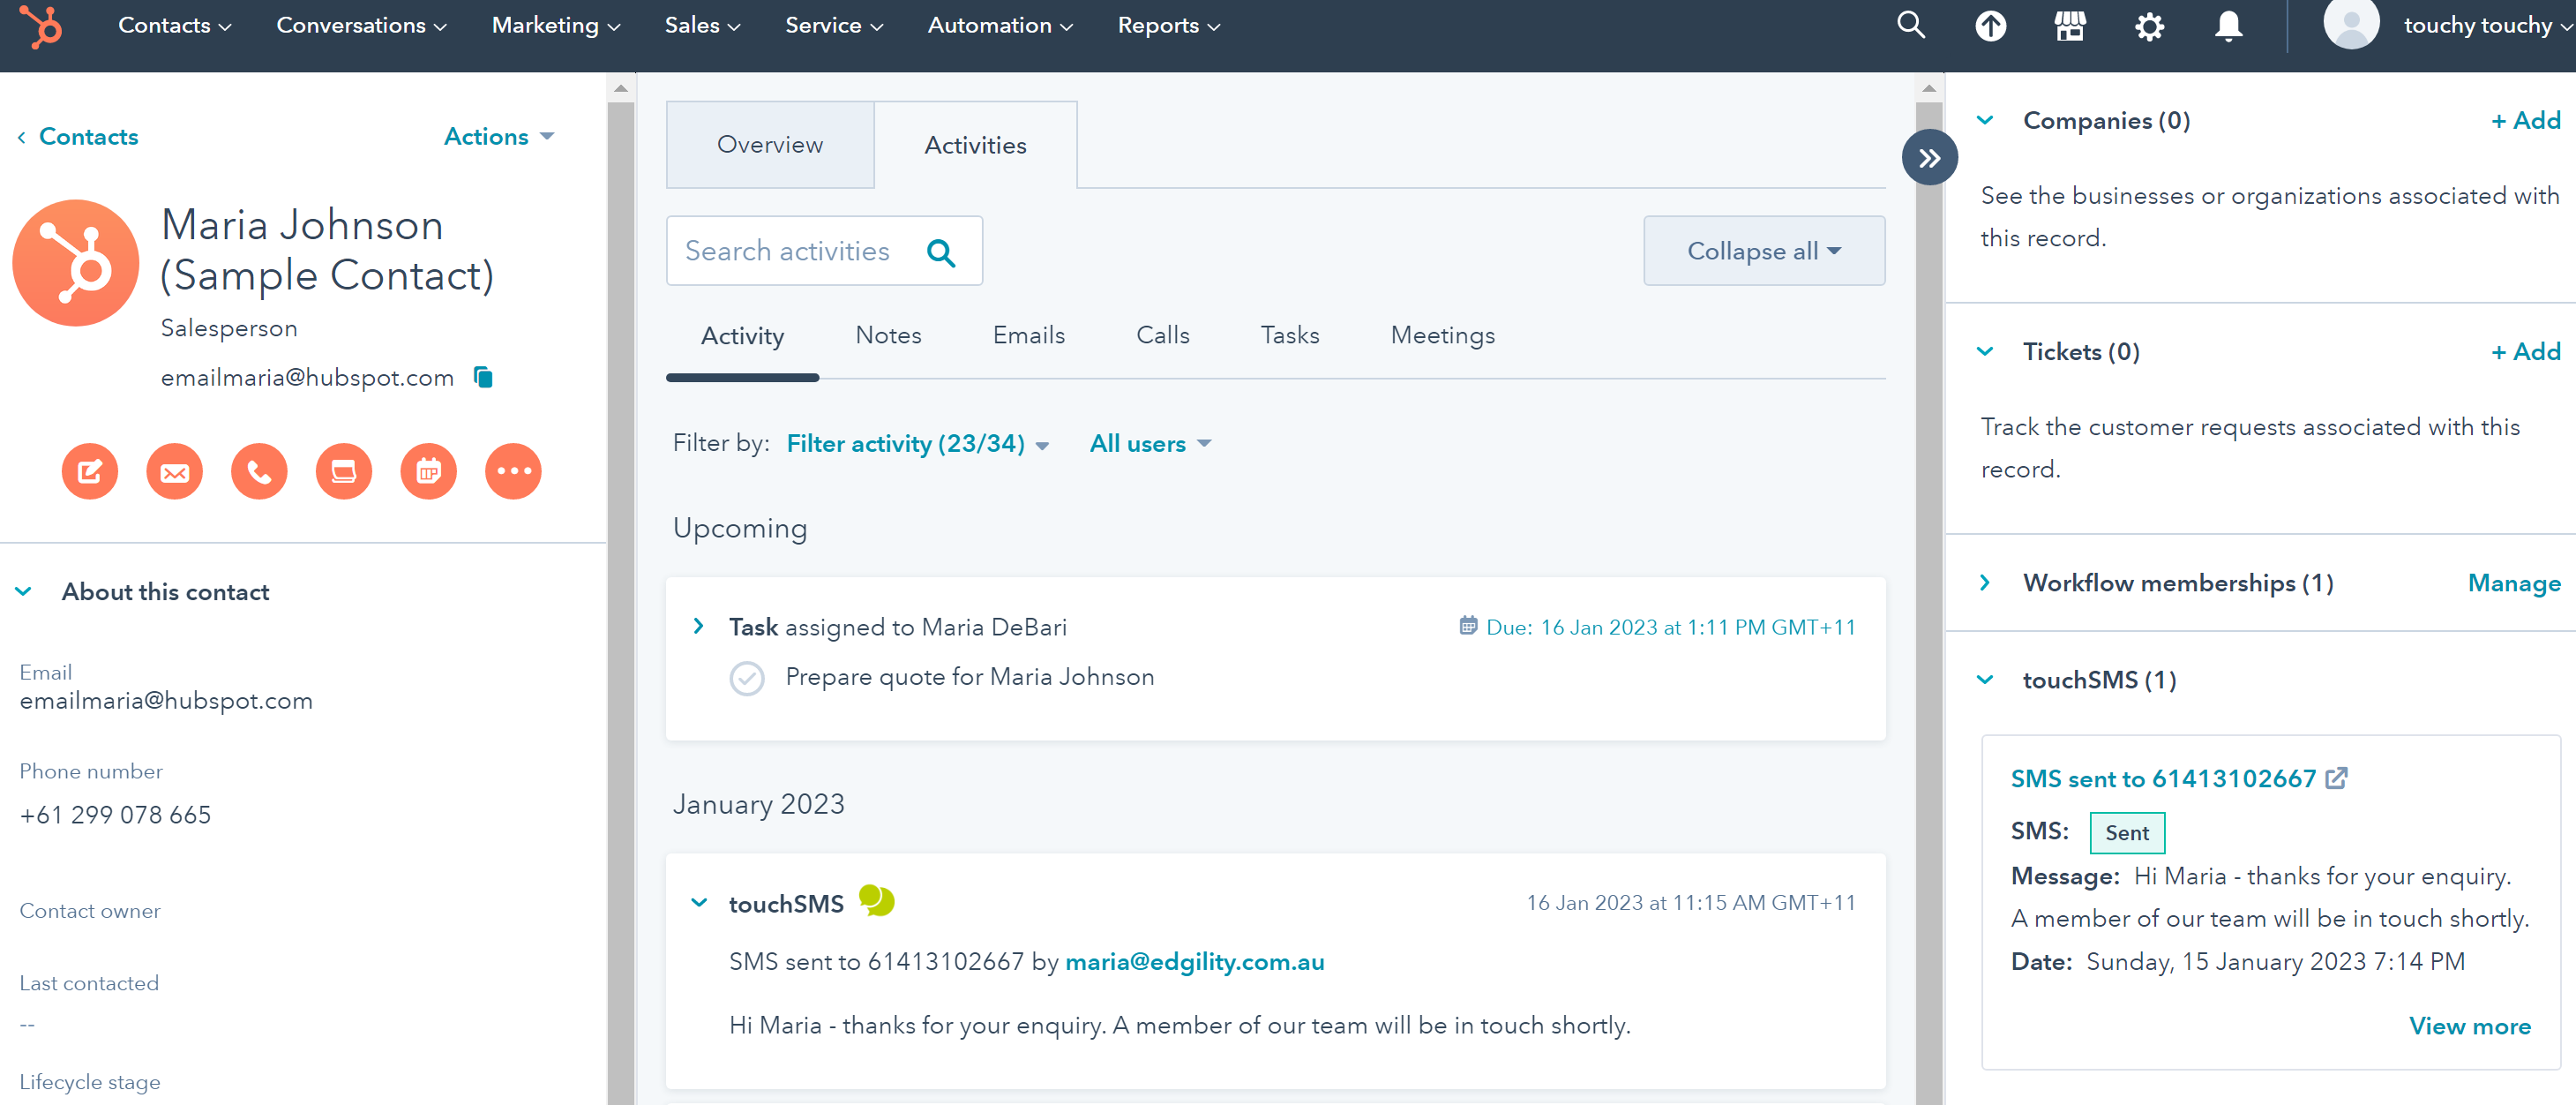
Send SMS directly to contacts from their Contact Profile in HubSpot. Messages sent and replies received will appear in their Activity List.
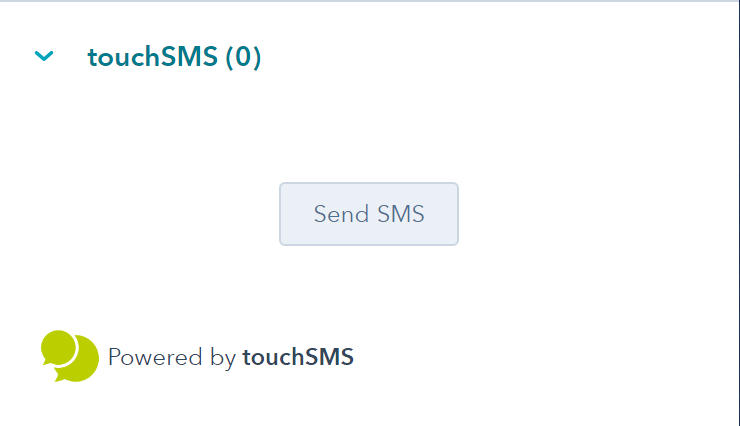
Once installed, the touchSMS integration will appear in the Actions bar on the right of your screen, when you open any contact profile.
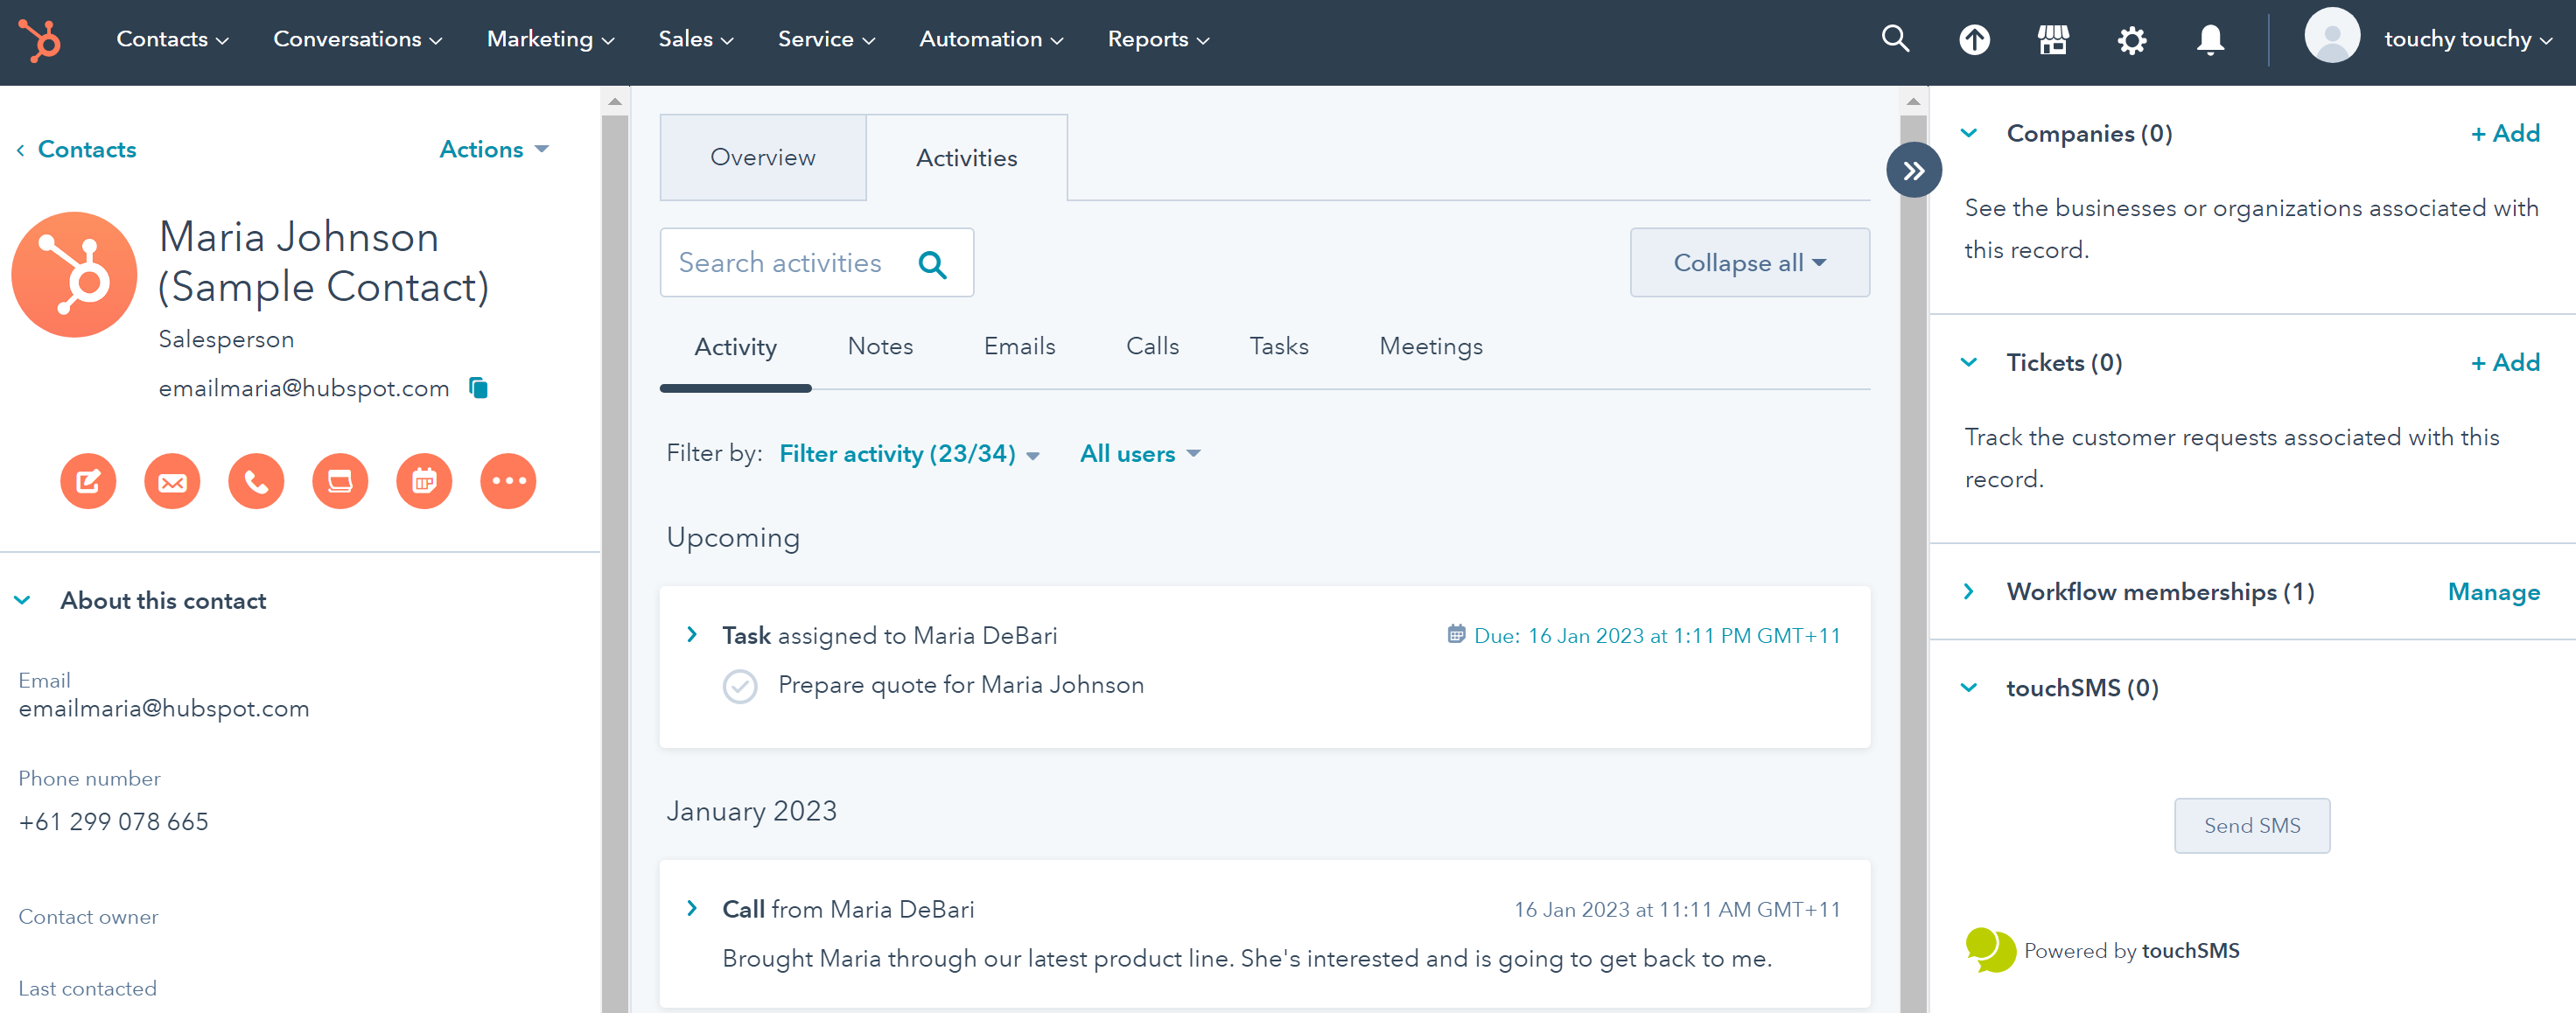
To send a message to your contact, simply click Send SMS
The SMS Chat window will appear with your SMS conversation thread – in the sample below we’re sending our first message to this contact. Select your Sender ID using the FROM dropdown, type your message in the content box using merge fields (Hubspot contact data) or choose from a pre-saved template.

Your message will appear in the SMS thread along with any replies.
A log of messages sent and received from the contact will appear in the Activity List in their Contact profile.
4. Use Inbound SMS as a Workflow Trigger (Virtual Number required)
If you have a touchSMS Virtual Number, any inbound SMS received from your contacts can be used to start a HubSpot workflow.
How to use Inbound SMS as a trigger:
-
Go to Workflows in HubSpot.
-
Create a new workflow (from scratch or template).
-
Click Set up triggers.
-
In the list of enrollment triggers, search for touchSMS.
-
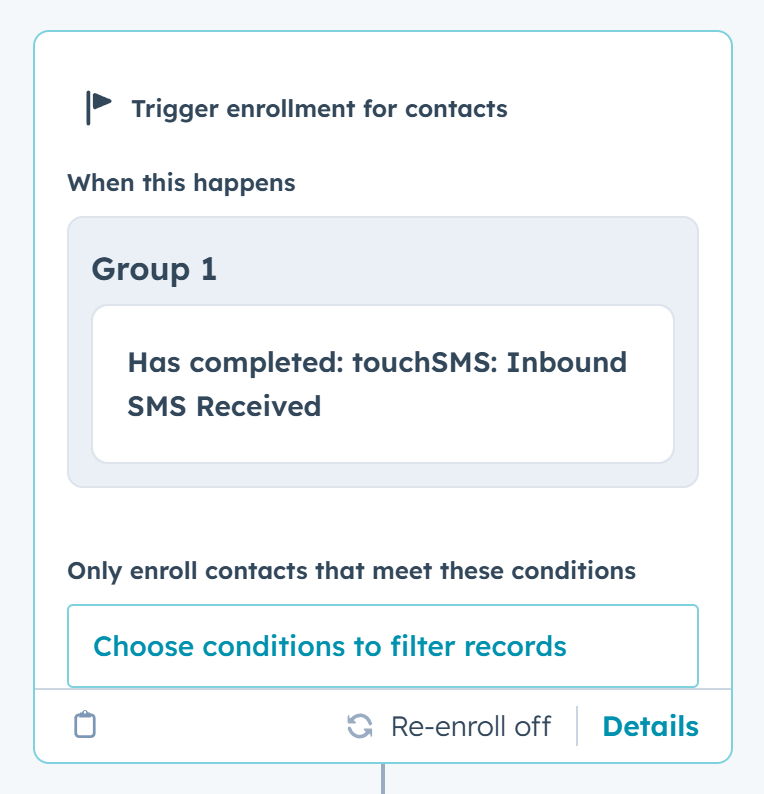
Select Inbound SMS received as your trigger.
-
Choose the conditions. Example:
-
Message contains a keyword (e.g., “YES”, “STOP”, “BOOK”)
-
Message received from a specific contact
-
Message received to a specific virtual number
-
Once saved, any inbound SMS matching your trigger criteria will automatically enroll the contact into the workflow.
If they reply, HubSpot can take immediate action based on your workflow setup.
5. Use touchSMS to Send SMS as a Workflow Action
touchSMS also appears as a Workflow Action, allowing you to automatically send outbound SMS to any contact who meets your enrollment criteria.
How to add touchSMS as an action:
-
Open your workflow.
-
Click the + icon to add an action.
-
Search for touchSMS in the list of actions.
-
Select Send SMS with touchSMS.
-
Compose your message.
-
Insert HubSpot personalisation tokens (merge fields) if needed:
-
First name
-
Appointment time
-
Company name, etc.
-
Messages will send automatically whenever a contact reaches this step in the workflow.
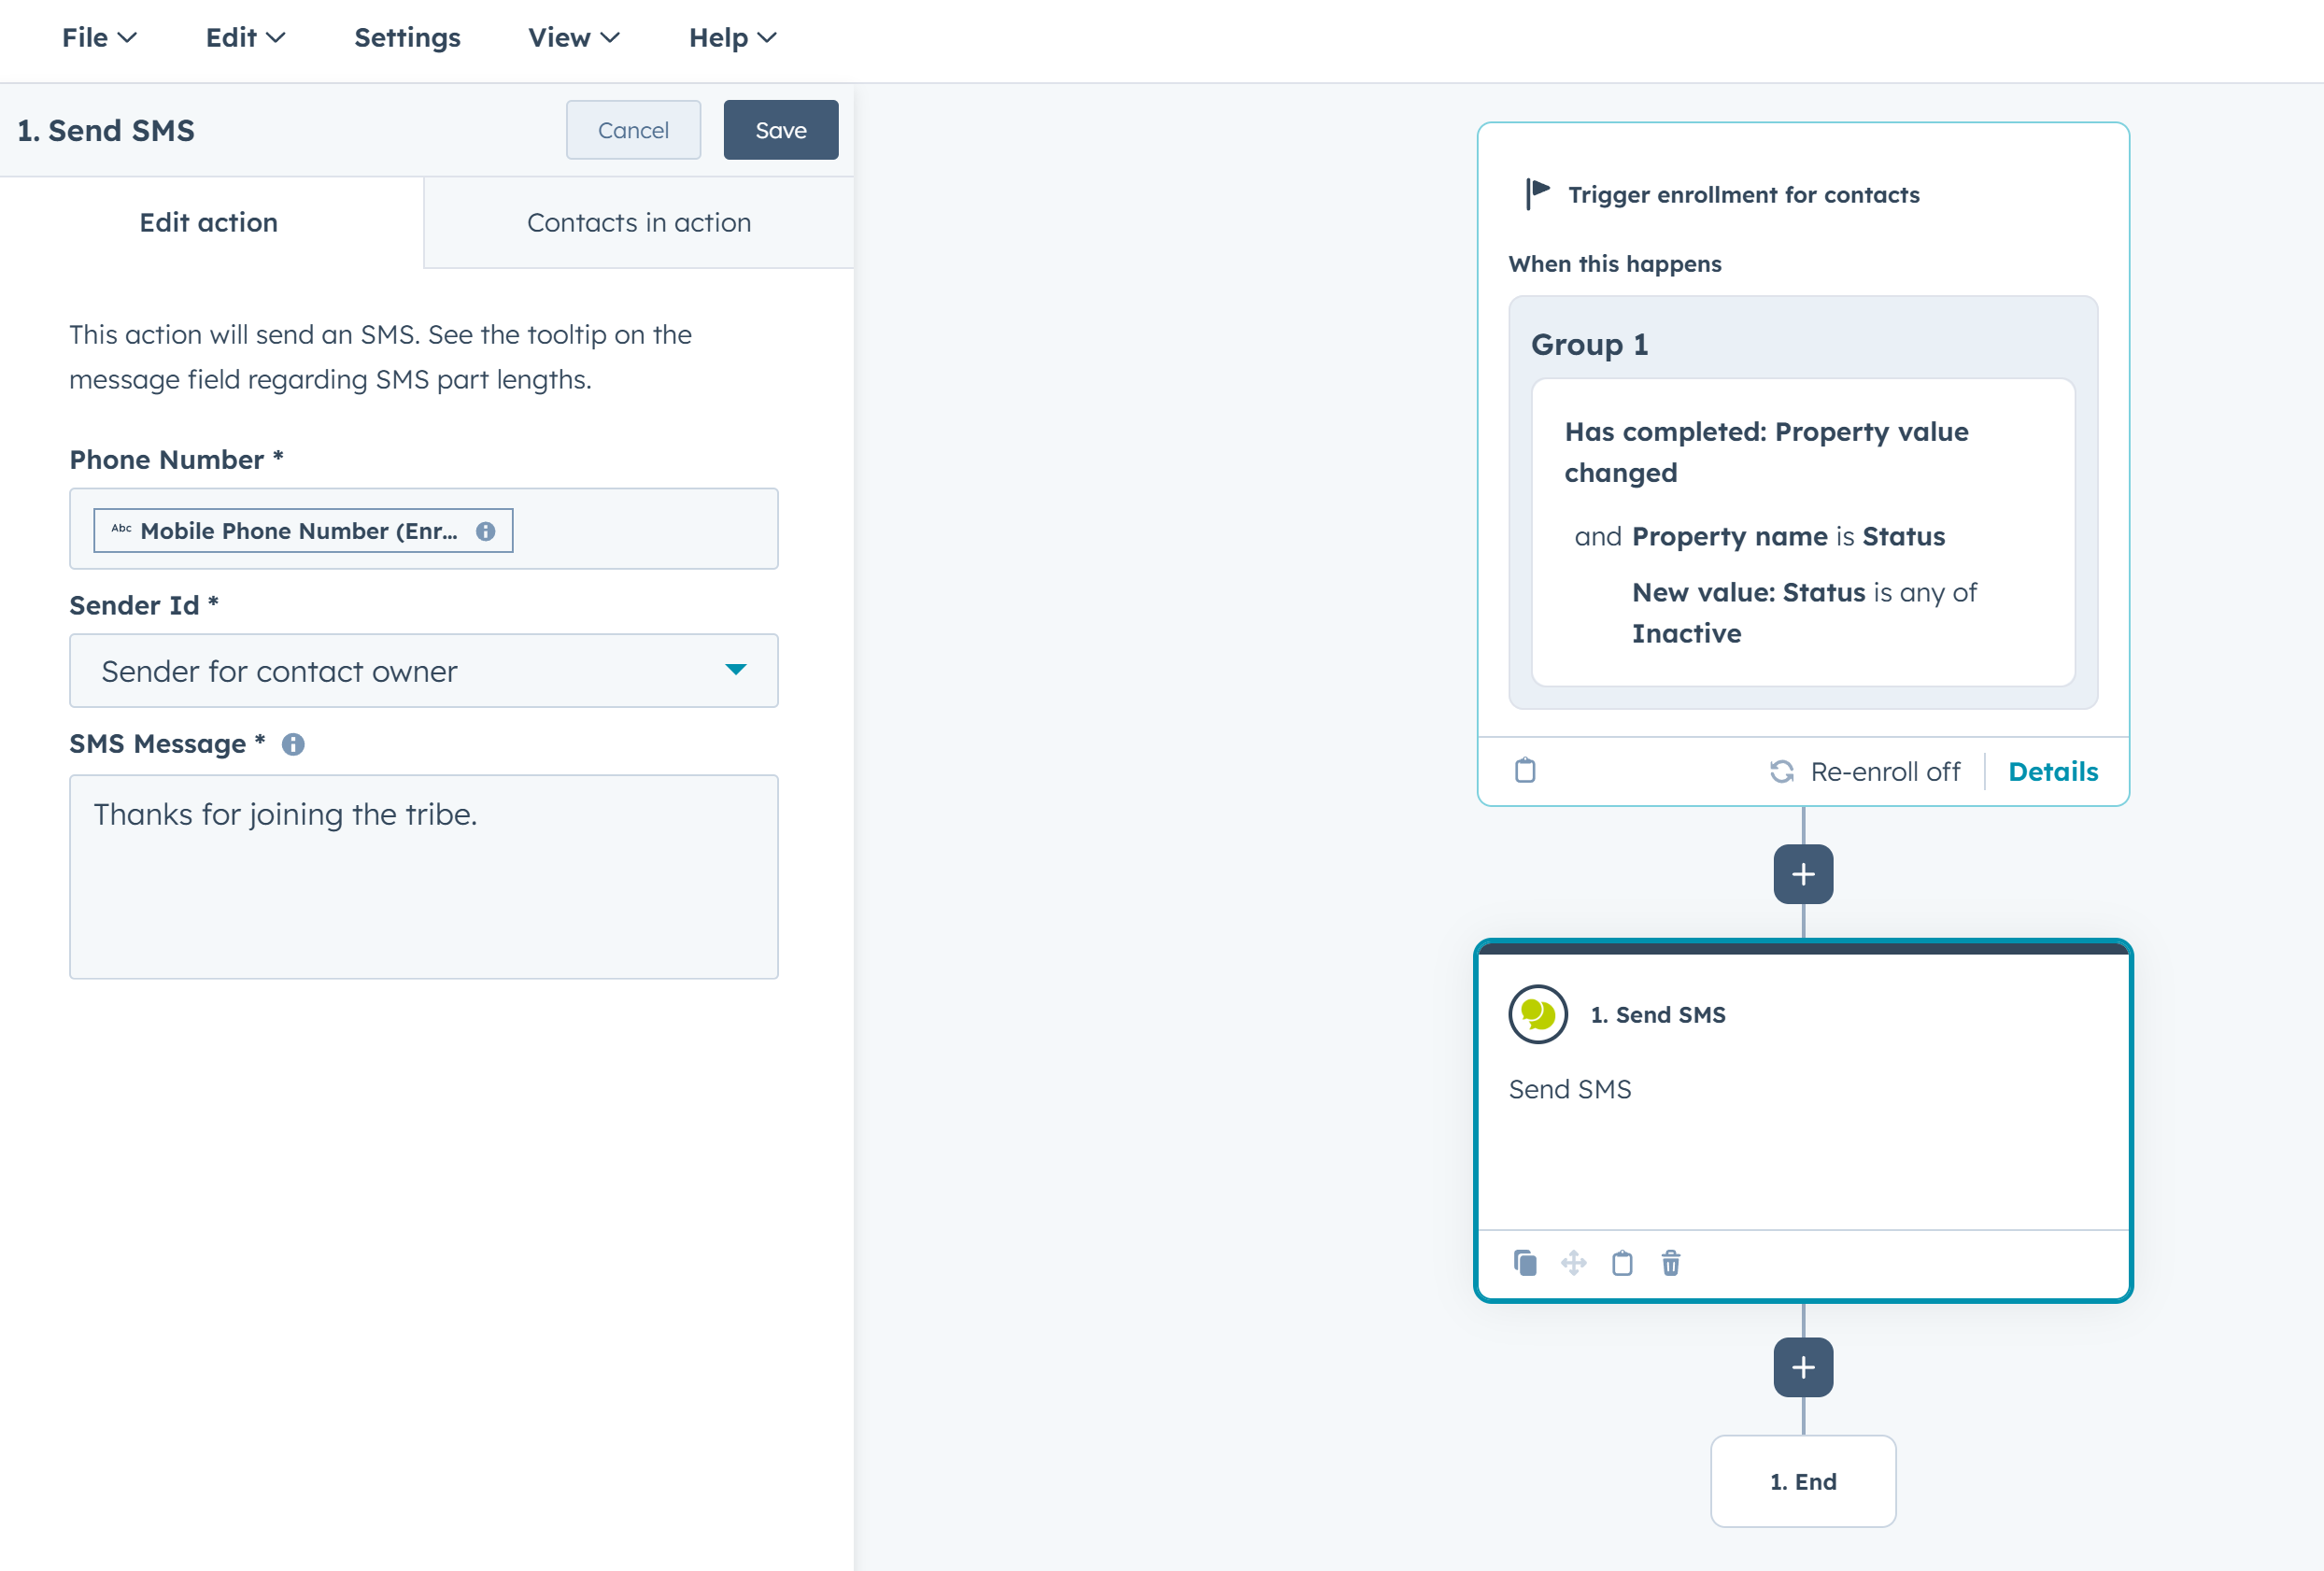
NOTE: When using the Sender ID option “Sender for Contact Owner”, you must assign the Sender ID to the HubSpot user in touchSMS settings.
Log in and go to INTEGRATIONS > HUBSPOT > CONFIGURE – click the three dots next to each user and select SETTINGS to assign their Sender ID
6. Use touchSMS to Send MMS as a Workflow Action
To trigger MMS from your HubSpot workflows by using the touchSMS Send MMS action, you will need to create the MMS template in your touchSMS account first.
Log in and head to SEND SMS > TEMPLATES > click CREATE TEMPLATE.
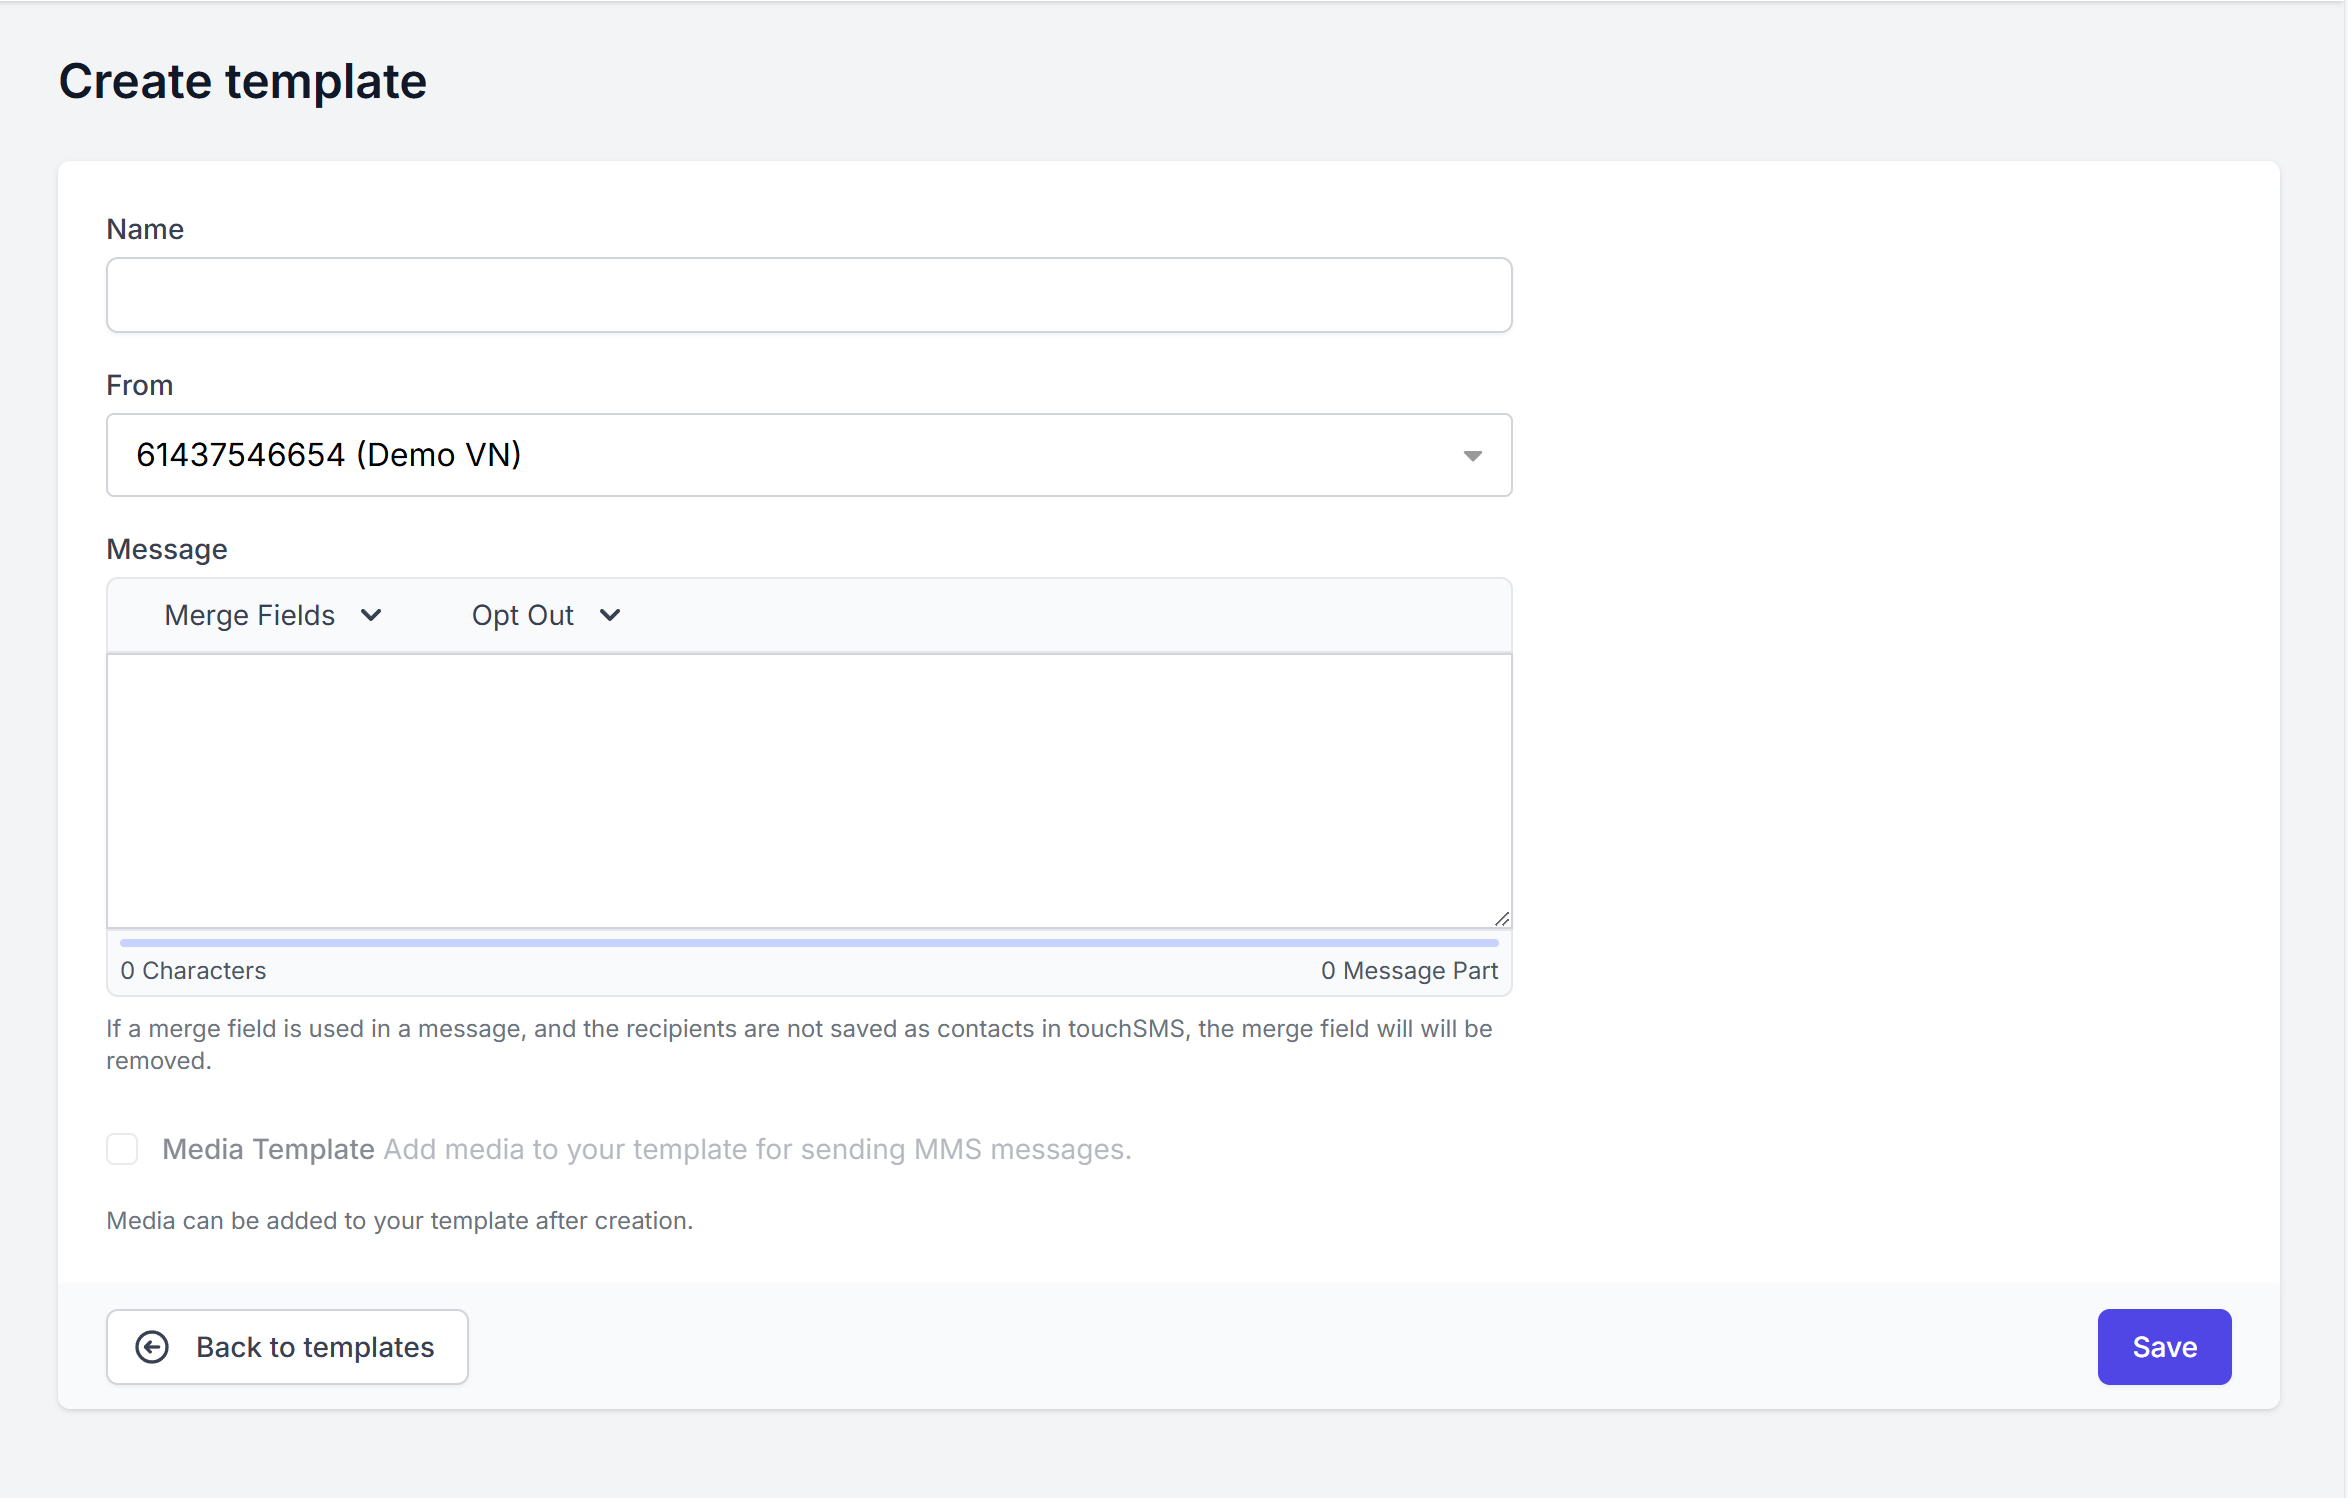
Name, select your Virtual Number and compose the text portion of your MMS first – media can be added to your template after it is saved.
Once your MMS is saved as a template, head back into HubSpot workflows and search for touchSMS as your action
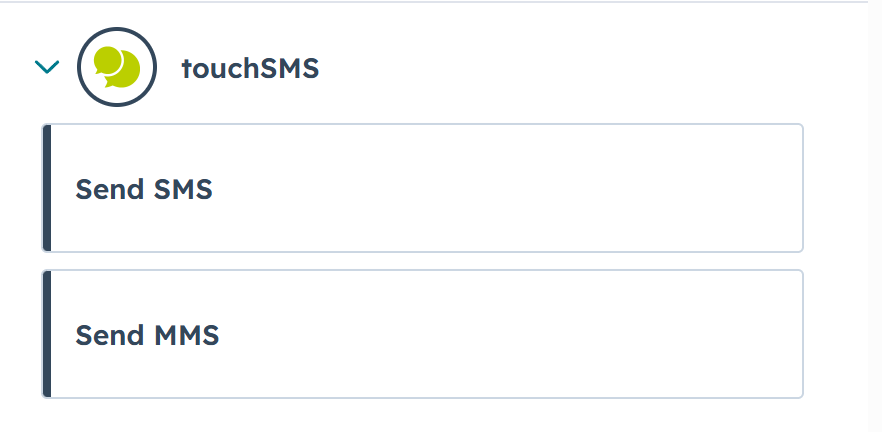
Select Send MMS
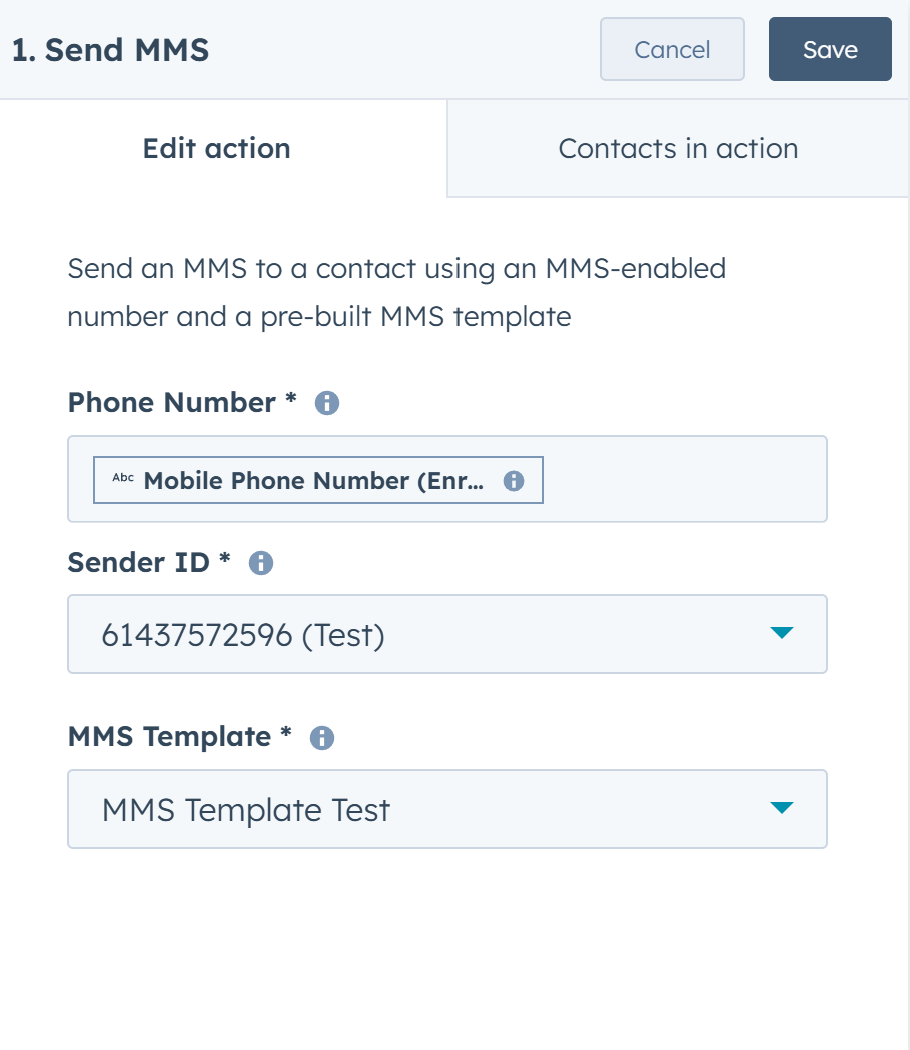
Use the dropdowns to configure the MMS into your workflow.
Ensure the Phone Number field points to the correct data field for your HubSpot contact’s mobile number.
7. Enable Inbound SMS Notifications in HubSpot Inbox
Add your unique HubSpot email address to your Virtual Number settings, to receive notifications on inbound SMS to your HubSpot inbox.
To do this, in HubSpot go to ACCOUNT MANAGEMENT > TOOLS > INBOXES
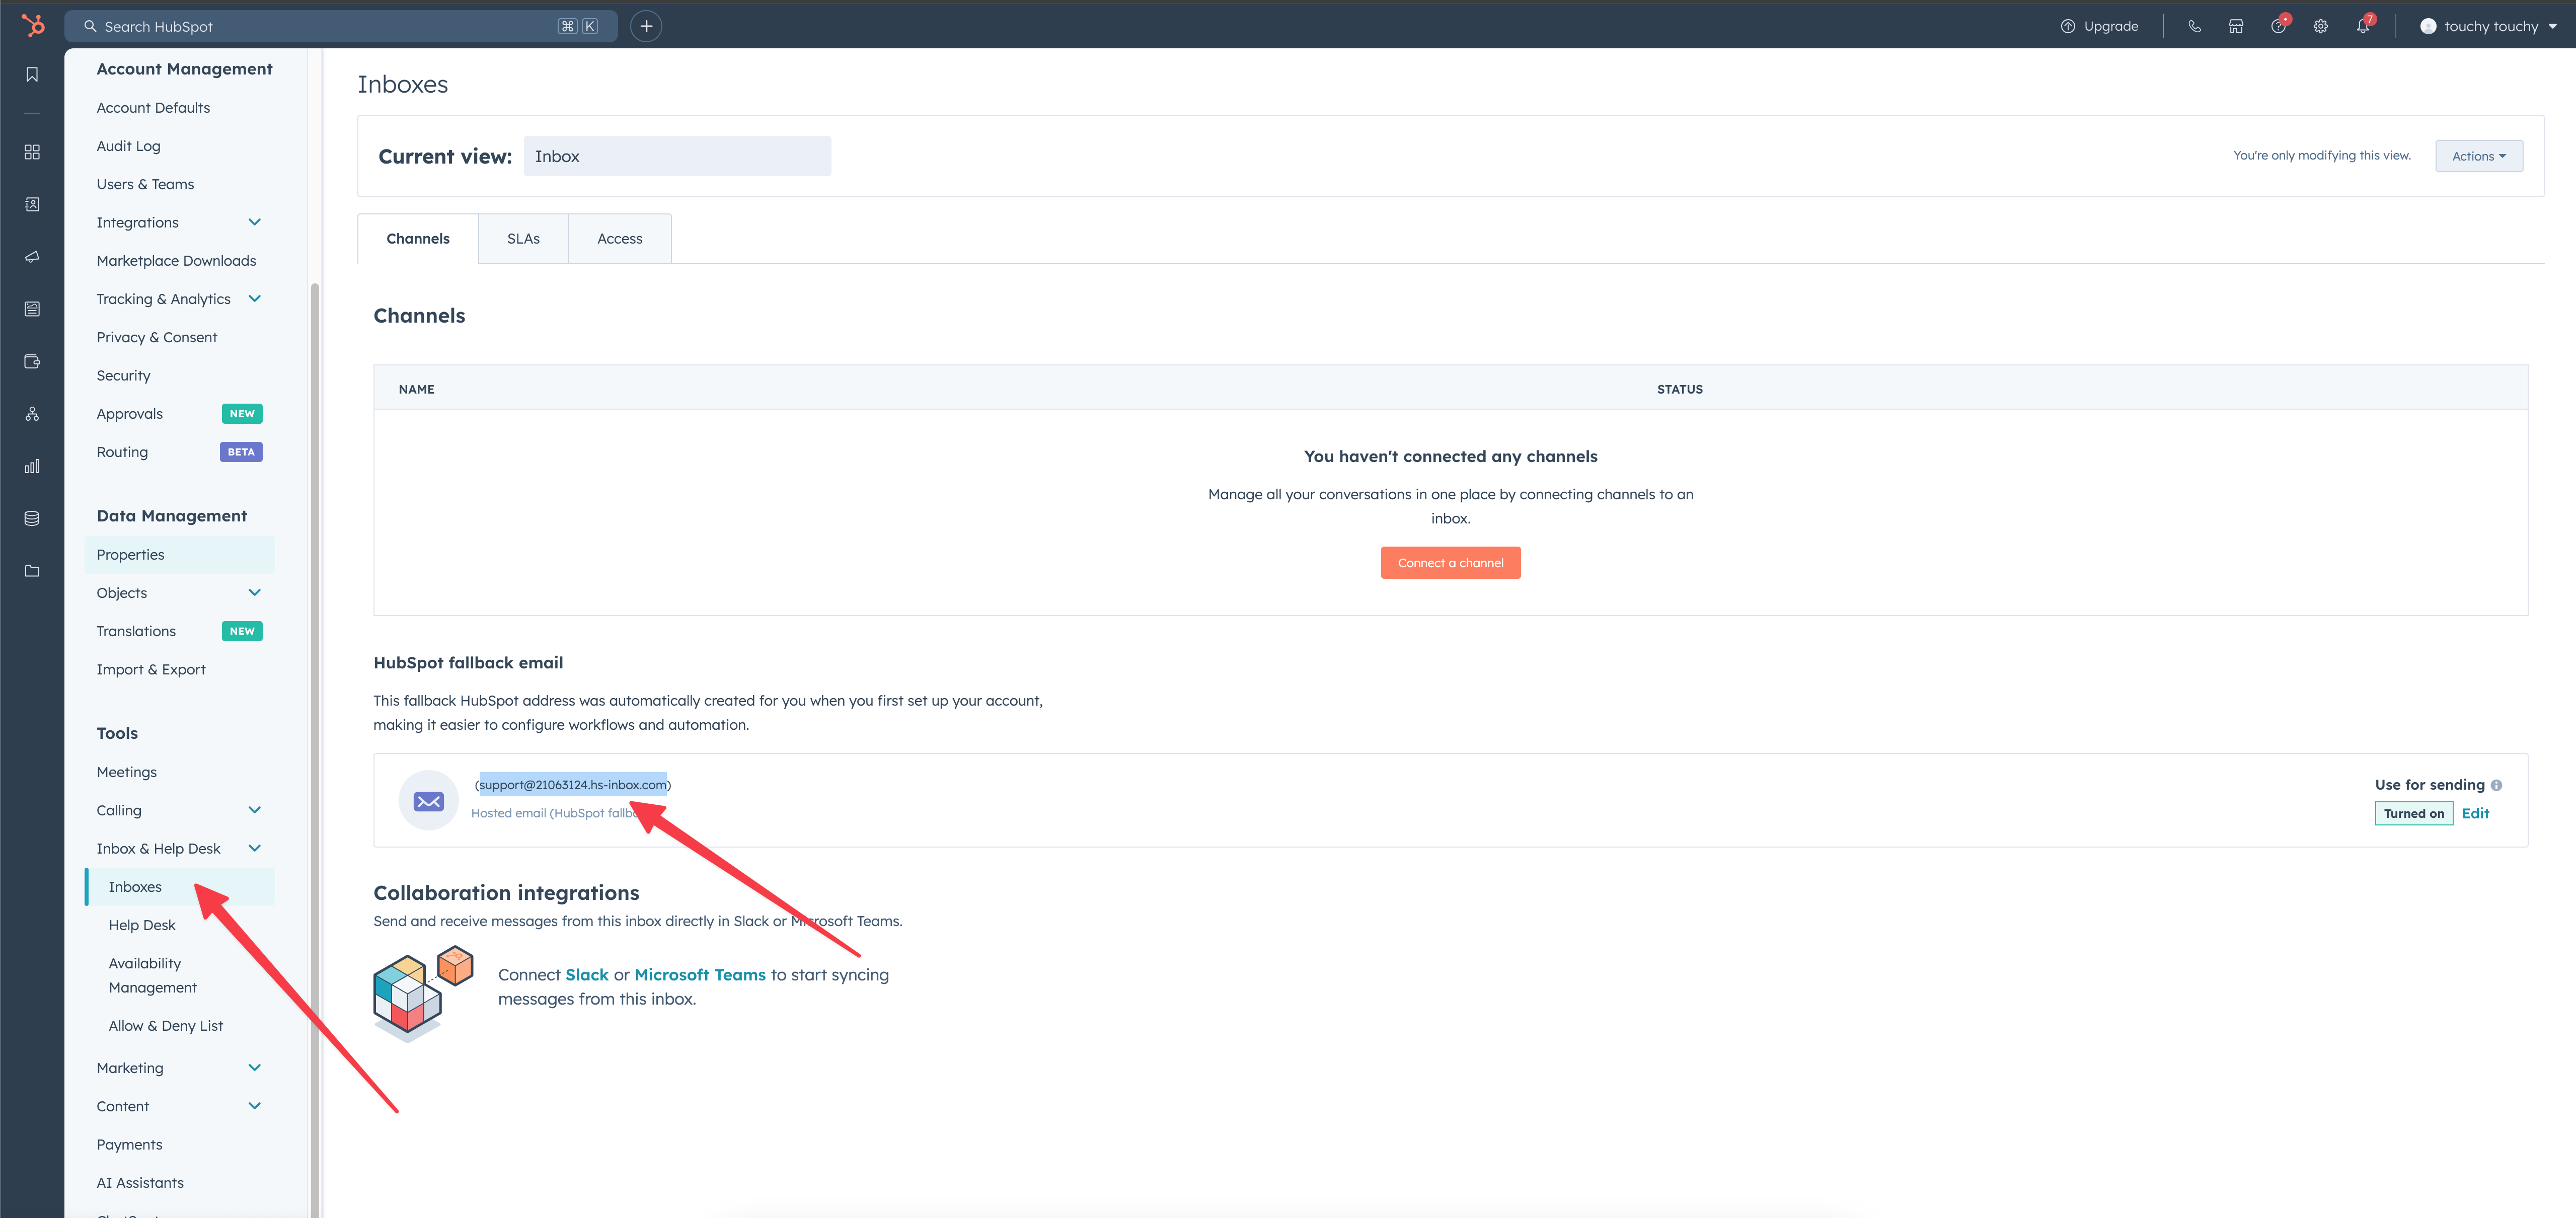
Copy your HubSpot Fallback Email.
Back in touchSMS, navigate to VIRTUAL NUMBER > click the three dots next to your VN and select EDIT > Paste your HubSpot Fallback Email in the Forward inbound messages to Email Address or Mobile Number area.
Click SAVE.
Any inbound messages will now be forwarded to your HubSpot Inbox.
NOTE: Inbound messages from a recipient you have already sent an SMS to using touchSMS, will automatically be linked to the correct HubSpot contact.