touchSMS for Microsoft Excel Set up and User Guide
1. Sign up and add credits
touchSMS is a pre-paid SMS platform – no contracts, hidden fees or minimum spend and you can close your account at any time. To sign up and activate your touchSMS account, all you need is a verified email address and mobile number – no credit card required.
We’ll even give you 10 free SMS credits to get you started.
You can then pre-purchase more credits as needed at 5c per credit or set up Auto-Top Up to ensure you don’t run out of credits when your sending. Click here for more information
One credit is used for 1 SMS of up to 160 characters. Your credit balance will always appear in the top right corner of your touchSMS account. To purchase credits log in to your touchSMS account:
- Navigate to Purchase > Credits
- Enter the number of prepaid Credits you wish to purchase and click Calculate.
- Complete your Payment Information using your credit card or PayPal account and click Finalise Purchase.
If you already have a touchSMS account, log in and move onto Step 2.
2. Download & install the Add-in
You can enable the touchSMS for Excel Add-in from within Excel Get Add-ins or Microsoft AppSource.
Enable the Add-in within Excel Add-ins:
-
-
-
- Opening a new spreadsheet
- Go to Insert > Get Add-ins
- Type touchSMS for Excel in the search field
- Click Add
-
-
Note: If you don’t see the touchSMS Add-in in the Home Ribbon simply click on;
Insert > Get Add-ins > My Add-ins > Click on touchSMS for Excel
In the ribbon that appears at the bottom of the screen click Add
Download the Add-in from Microsoft AppSource:
-
-
-
- Visit Microsoft AppSource and search touchSMS for Excel
- Click Get it Now – you may be asked to log in to your Microsoft account before it takes you to the installation page
- Click Open in Excel which will download an excel spreadsheet
- Open sheet and Enable editing
- Click Trust this Add-in to finish the installation
-
-
3. Connecting Excel with your touchSMS Account
The first time you use touchSMS for Excel, you will need to connect Excel to your touchSMS account using your API keys. To set up an API key, log in to your touchSMS account:
- Navigate to Settings > API Keys
- Click Create API Key.
- Enter a Name (for example; Excel) for your API Key, the status will be set to Active by default, and click Save.
4. Sending SMS from touchSMS for Excel
Sending SMS using the touchSMS for Excel Add-in is fast and efficient.
1. Export or open your excel spreadsheet containing your contact’s details
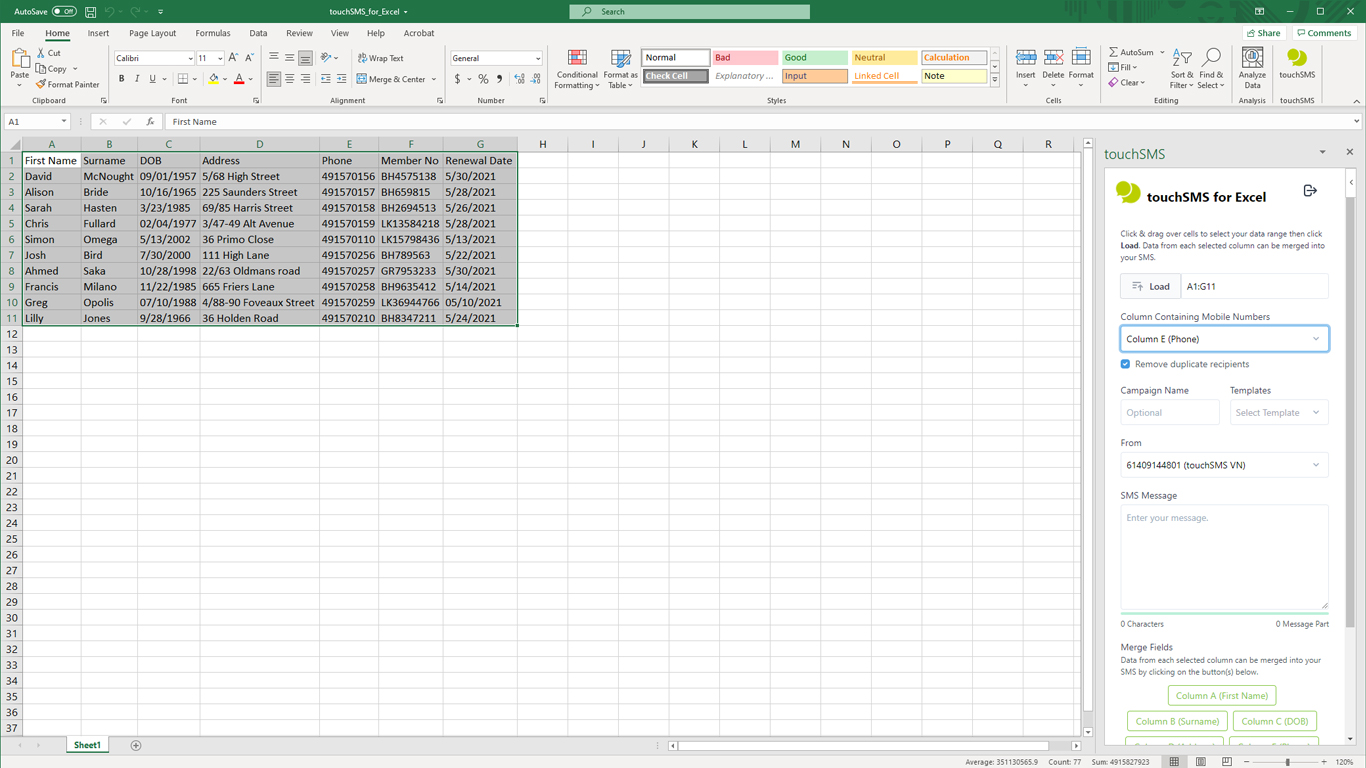
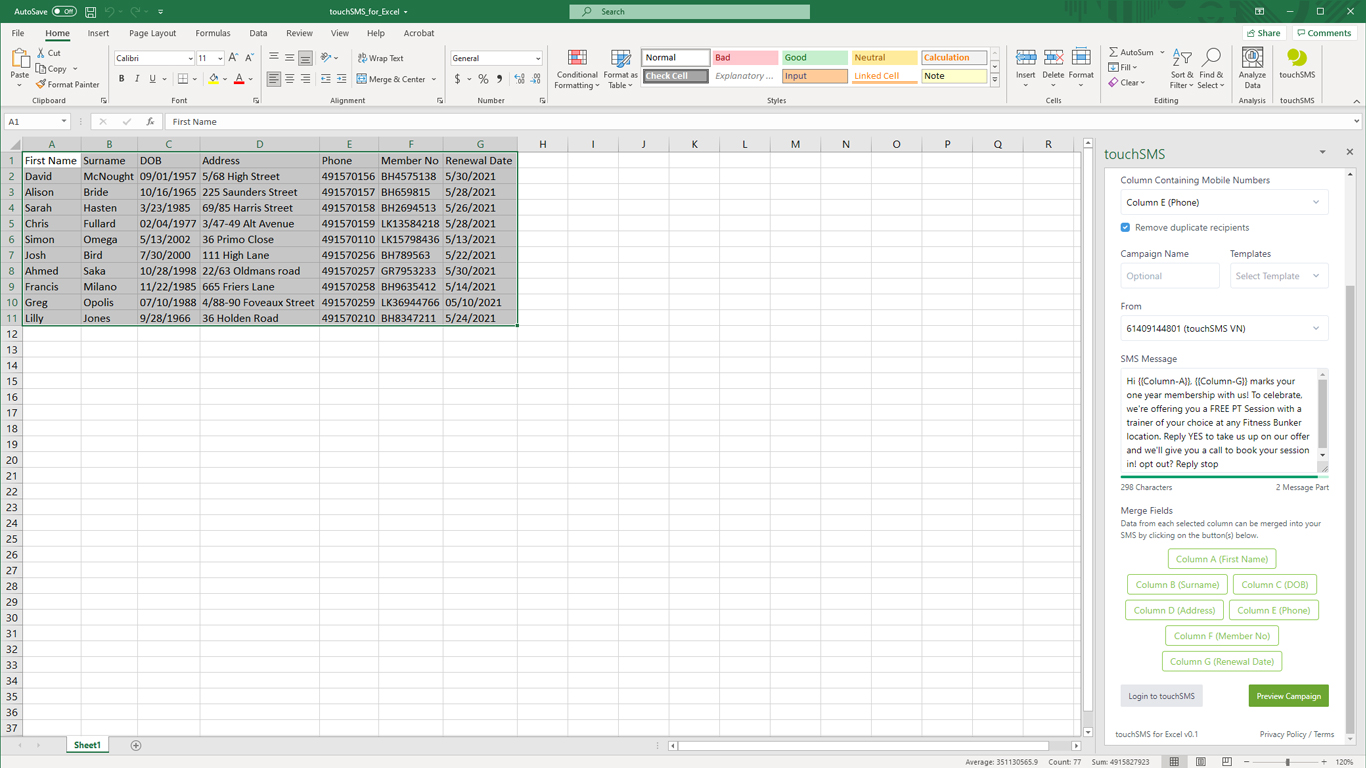
2. Click on the touchSMS Add-in in your Home menu ribbon to open your sending screen.

(To create templates, login to your touchSMS account and go to SMS > Templates click here for more information)
If you would like your recipients to reply to your SMS
-
- Shared Local Number – Replies to Web Inbox & Email (Allow Replies)
This is a shared pool of mobile numbers that allow you to receive replies to SMS sent. Numbers are randomly selected, so recipients receive messages from a different number each time you send. This is free to use and receive replies. - Virtual Number – Replies to Web Inbox & Email (Allow Replies)
You can purchase a Virtual Number from your touchSMS account (pricing and availability vary per region). This number is assigned to your account exclusively to send and receive messages, so recipients receive messages from the same number each time you send. Click here for more info - Sender ID – No Replies
Replace the sender number with a word like ALERT, URGENT or send from your brand name, by setting up an Alphanumeric Sender ID (availability varies per region). Telecommunication protocols limit an Alpha Sender ID to a maximum of 11 characters long and cannot contain any spaces or symbols, so you sometimes need to get creative with abbreviating longer names. Recipients CANNOT reply to messages sent using a Sender ID. - Own Number – Replies to Your Mobile
As your mobile number is verified at signup, you can send SMS from touchSMS using your registered mobile number. Replies to messages sent using your own mobile number will be received by your mobile therefore not received in your touchSMS account.
- Shared Local Number – Replies to Web Inbox & Email (Allow Replies)
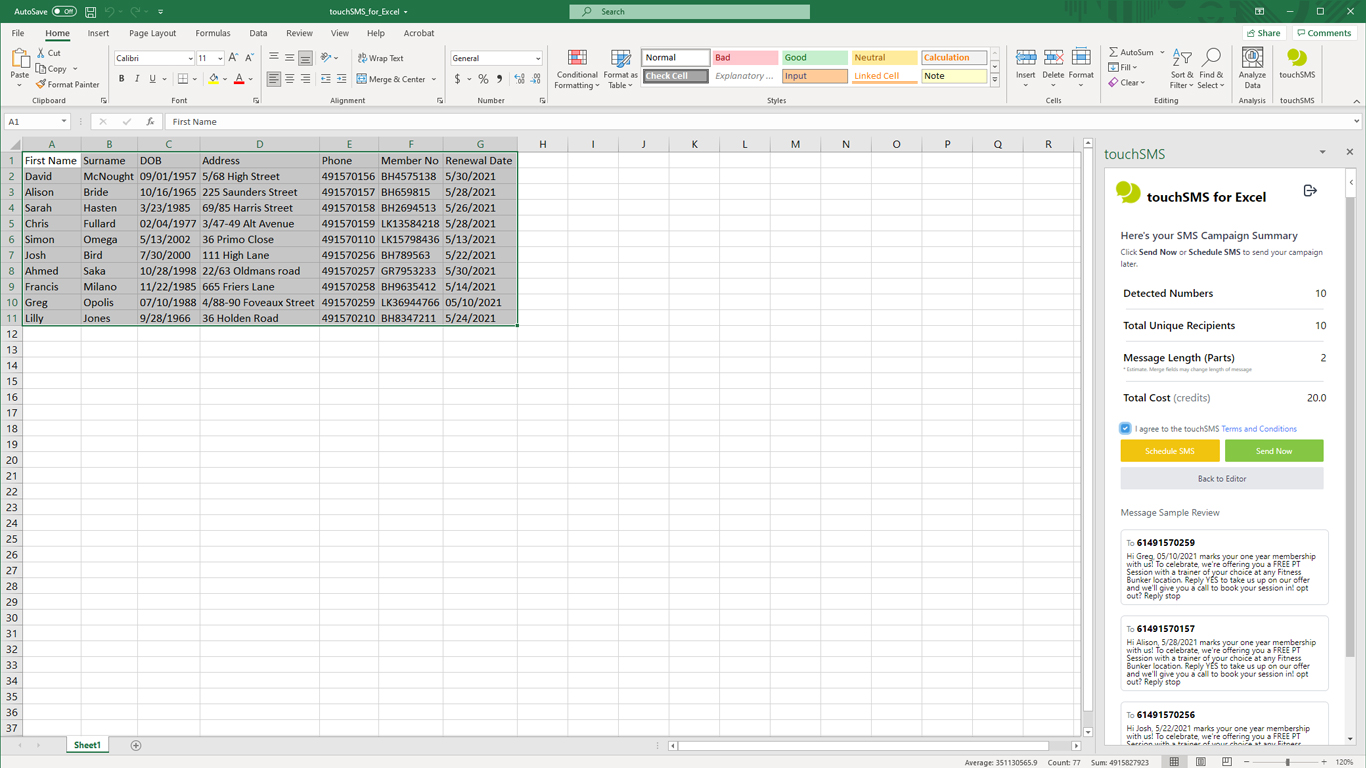
 11. The Campaign Summary will detail exactly how many numbers you are sending to, the length of the message, and calculate the cost of your campaign in SMS credits. (If you do not have enough SMS credits a notification will appear, that will direct you to Purchases in touchSMS so you can purchase more)
12. You can shuffle through a preview of messages at the bottom of the screen, to ensure your message looks right across your entire sending batch. All merge fields will be populated in the preview.
13. You must check the box “I agree to the touchSMS Terms and Conditions” before sending.
14. Click Send Now to submit your campaign for delivery
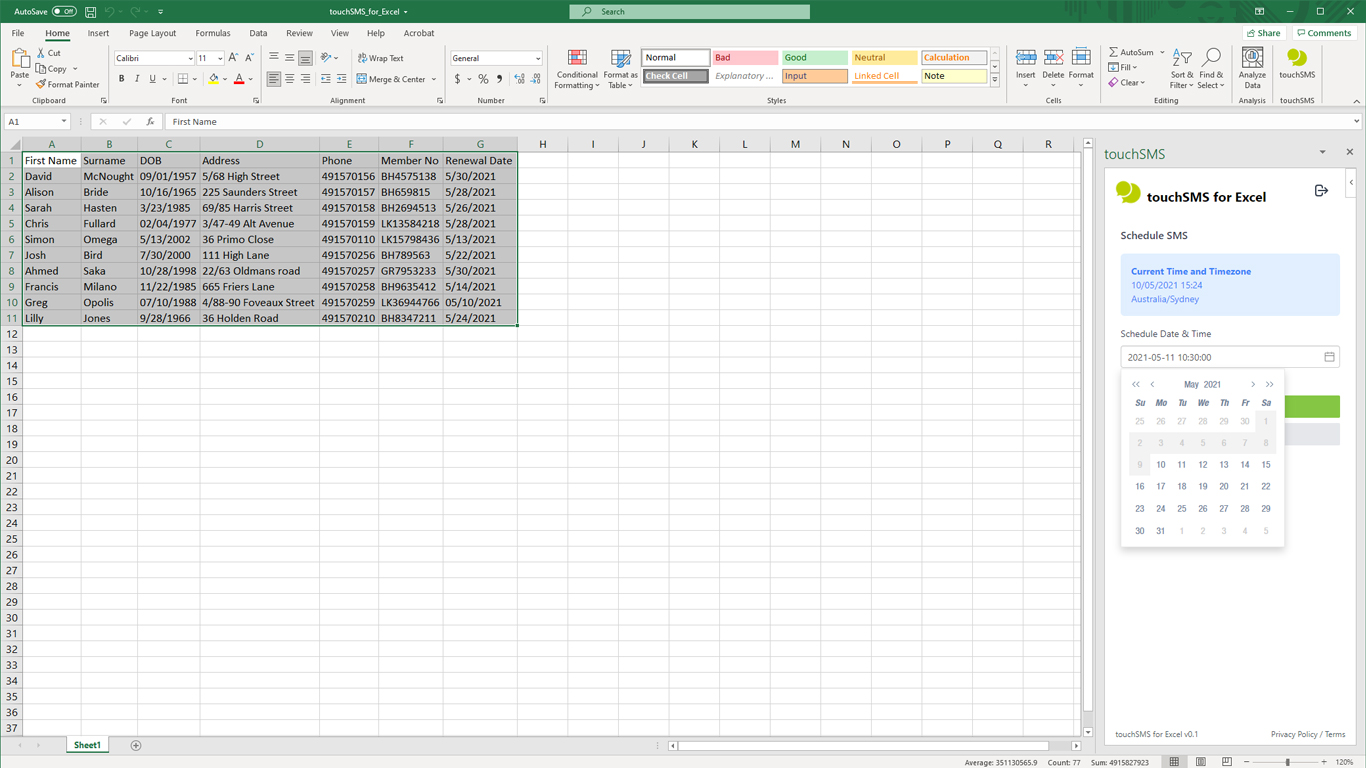
15. To schedule your message to send at a later date or time, click Schedule SMS and use the date and time picker to set when it should be delivered. Click Save Schedule to confirm. You must check the box “I agreed to the touchSMS Terms and Conditions” before clicking Schedule SMS.
16. Once scheduled or sent, you can click to view live delivery reports of your message in touchSMS.
5. Hiding or removing Excel to SMS Add-in
To remove the touchSMS for Excel Add-in, simply right-click on the Add-in in the menu ribbon and select “Remove Add-in”.
Troubleshooting
Q. Why is the touchSMS for Excel Add-in greyed out and I can’t access the Add-in?
This is because you are running a new version of Excel and the workbook (Excel file) you have opened is saved as an older format. To rectify this issue and convert your workbook;
- Click File > Info > Compatability Mode.
- Click Convert and follow the prompts.
If you require assistance setting up touchSMS for Excel our support team is available on live chat within business hours or you can reach our team by submitting a support ticket here.


