Enable External Forwarding in Microsoft 365
If your organization controls two office365 tenants, at some point you may wish to enable forwarding of email from an address hosted in one tenant to an address hosted in another. Email forwarding can result in the following bounce back message:
Remote Server returned ‘550 5.7.520 Access denied, Your organization does not allow external forwarding. Please contact your administrator for further assistance. AS(7555)’
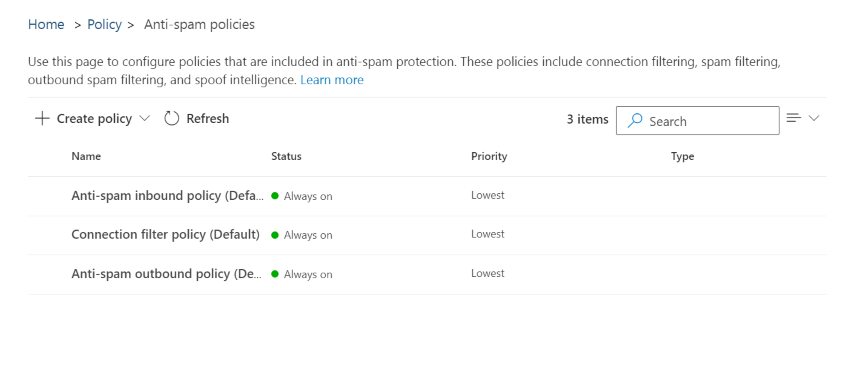
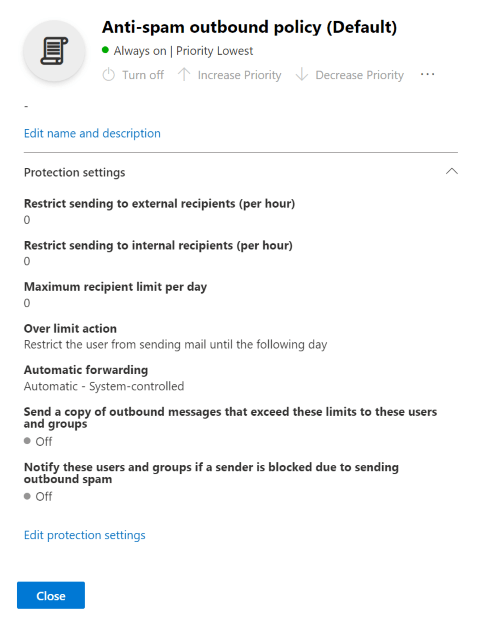
By default, Microsoft 365 Defender sets up an Anti-Spam outbound policy. And the policy default sets Automatic Forwarding to “Automatic: System Controlled.” To change the outbound spam protection settings, contact your Microsoft 365 administrator and ask them to allow automatic external forwarding for any mailboxes you want to use Email to SMS. We’ve created this guide to help your administrators find and change the outbound spam protection policy that is blocking your forward.
For Microsoft 365 Administrators
Configuring external email forwarding in Microsoft 365 is Microsoft’s documentation of the security features they’ve put in place. Below you will find a step-by-step guide for changing the specific portion of the automatic forwarding settings needed to all Email to SMS.
Special Note: GoDaddy Based 365
If your Microsoft 365 service was purchased through GoDaddy, you should not continue with the instructions below as they have their own method for changing these settings as outlined in their help here: Microsoft 365 from GoDaddy Help: Enable external email forwarding
Enable Automatic External Forwarding for All Mailboxes
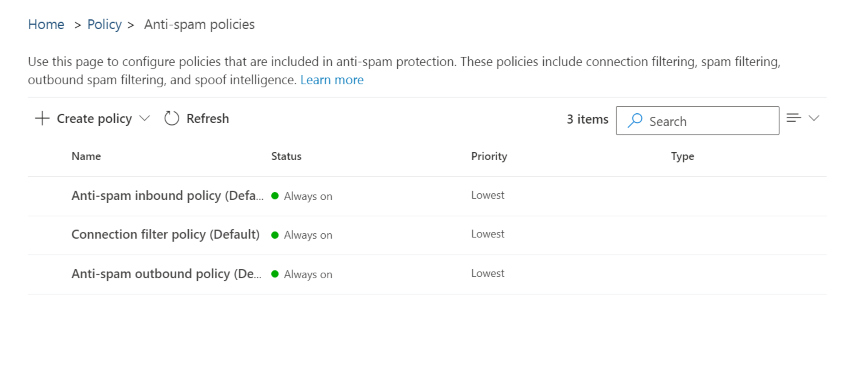
Log in to your Office 365 Security & Compliance portal for Microsoft 365 and choose Threat management > Policy > Anti-spam or head directly to the Anti-spam settings page here: https://protection.office.com/antispam
Click on Anti-spam outbound policy (Default) and scroll to click the Edit protection settings link at the bottom of the sidebar.
Find the section called Forwarding Rules, and the dropdown list called Automatic Forwarding Rules. Pull that list down and choose On – Forwarding is enabled. Click Save at the bottom.
Enable Automatic External Forwarding for Individual Mailboxes
Log in to your Office 365 Security & Compliance portal for Microsoft 365 and choose Threat management > Policy > Anti-spam or head directly to the Anti-spam settings page here: https://protection.office.com/antispam
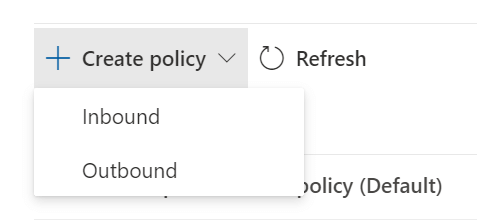
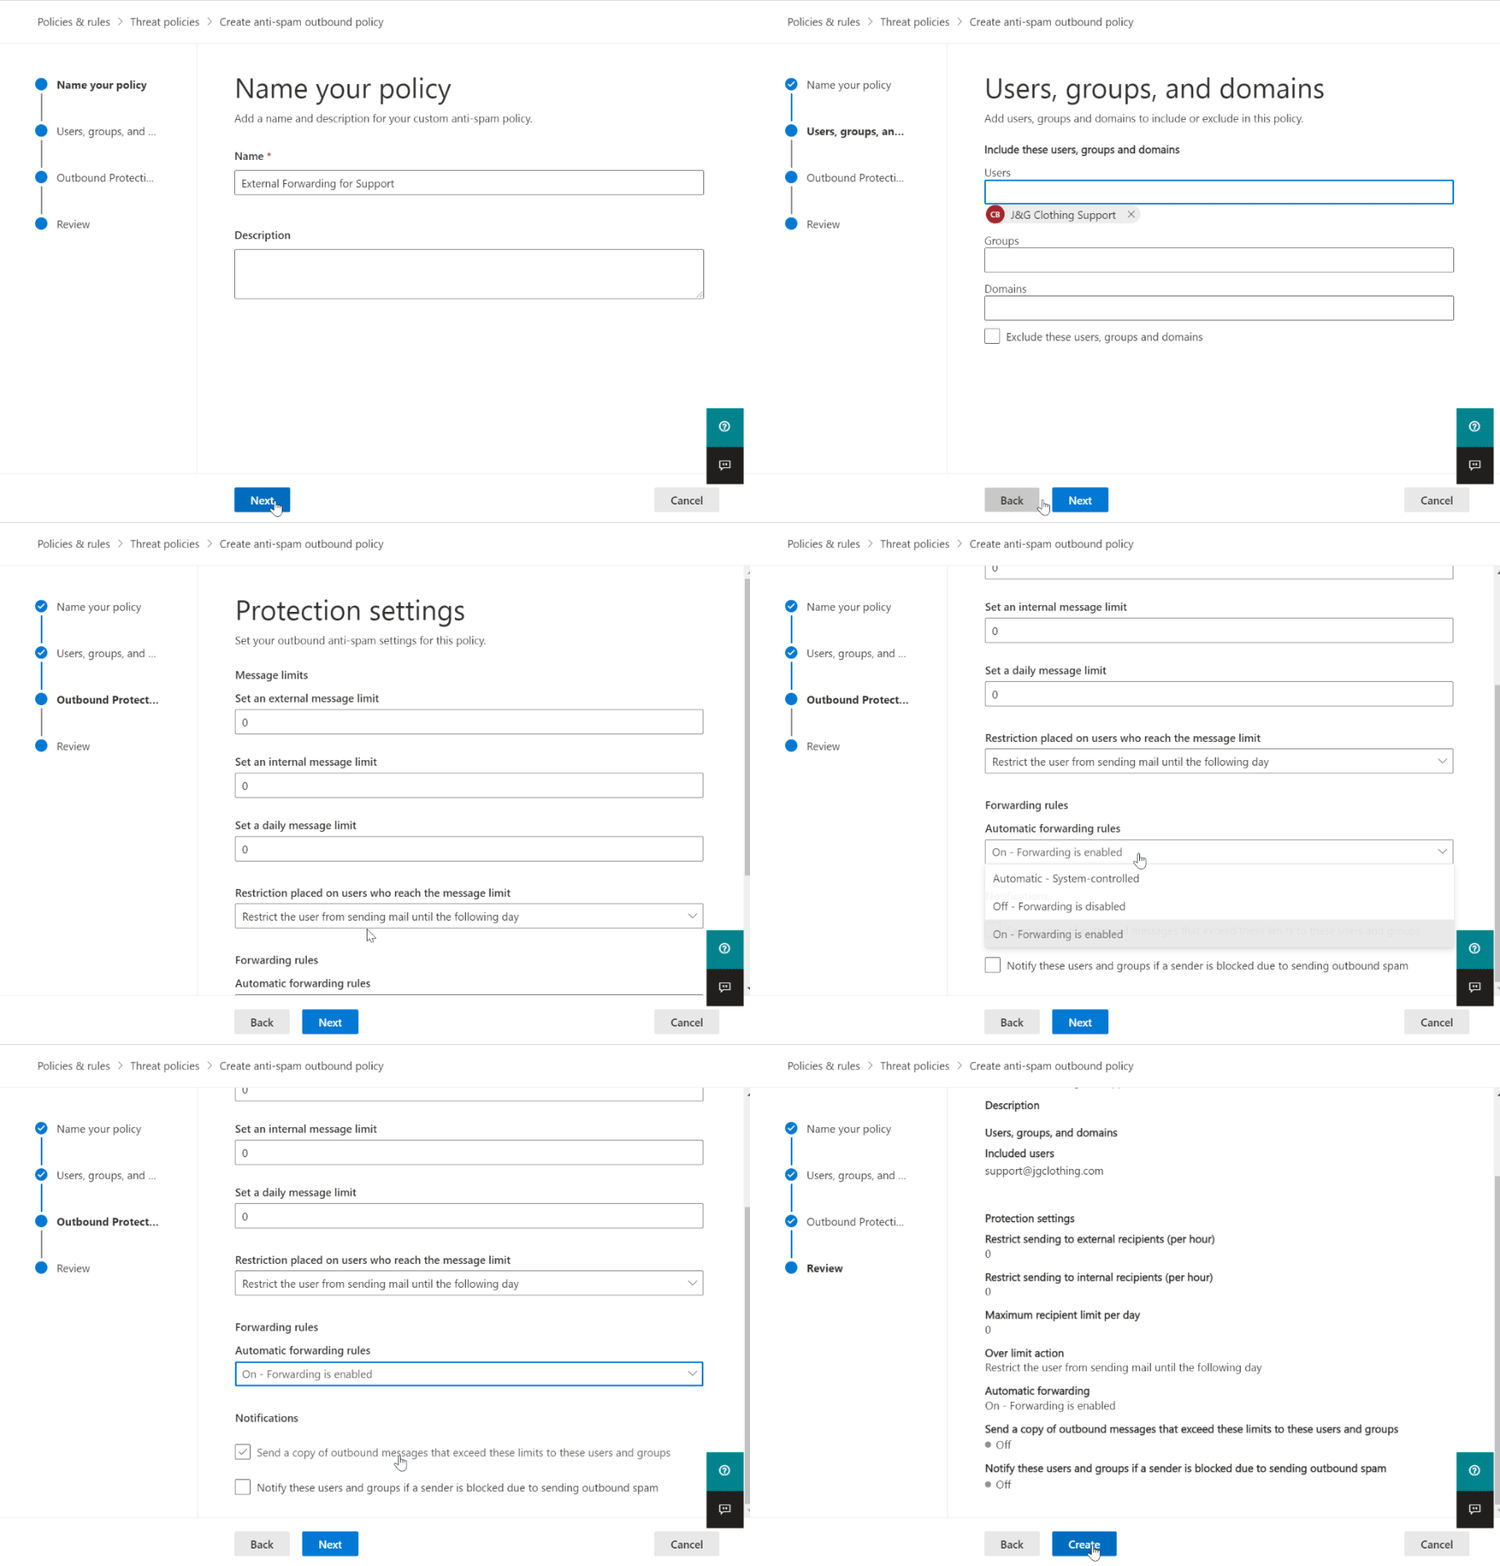
Click + Create policy and choose Outbound.
Give your new outbound spam filter policy a Name and Description.
Click Next and search to find the user account you want to allow to forward, i.e. the email account that you are using to send Email to SMS, which will display under the Users field after you select it.
Click Next again, scroll to the Forwarding rules section, and click the dropdown under Automatic forwarding rules. Choose On – Forwarding is enabled, then click Next.
Review the settings on the last screen and click Create to create your new outbound policy for the specified user(s).
Note: You may have other transport rules or spam policies in place at Microsoft 365 that block external forwarding in addition to the outbound spam filtering we’ve covered here. If automatic external forwarding is still blocked after adjusting these policies, you will want to reach out to your Microsoft 365 support for assistance in finding any further blocking that has been set up in your Microsoft 365 account.


